Setup Unity Project
Info
It is advised to checkout the Quick Start Demo tutorial before reading this section.
This page is a tutorial for setting up a AWSIM Unity project.
Environment preparation
System setup
- Make sure your machine meets the required hardware specifications.
- NOTE: PC requirements may vary depending on simulation contents which may change as the simulator develops
- Prepare a desktop PC with Ubuntu 22.04 installed.
- Install Nvidia drivers and Vulkan Graphics API.
- Install git.
-
Set the ROS 2 middleware and the localhost only mode in
~/.profile(or, in~/.bash_profileor~/bash_loginif either of those exists) file:export ROS_LOCALHOST_ONLY=1 export RMW_IMPLEMENTATION=rmw_cyclonedds_cppWarning
A system restart is required for these changes to work.
-
Set the system optimizations by adding this code to the very bottom of your
~/.bashrcfile:if [ ! -e /tmp/cycloneDDS_configured ]; then sudo sysctl -w net.core.rmem_max=2147483647 sudo ip link set lo multicast on touch /tmp/cycloneDDS_configured fiInfo
As a result, each time you run the terminal (
bashprompt), your OS will be configured for the best ROS 2 performance. Make sure you open your terminal at least one before running any instance of AWSIM (or Editor running the AWSIM).
- Make sure your machine meets the required hardware specifications.
- NOTE: PC requirements may vary depending on simulation contents which may change as the simulator develops
- Prepare a desktop PC with Windows 10 or 11 (64 bit) installed.
- Install git.
- Install Microsoft Visual C++ Redistributable packages for Visual Studio 2015, 2017, 2019, and 2022 (X64 Architecture)
ROS 2
AWSIM comes with a standalone flavor of Ros2ForUnity. This means that, to avoid internal conflicts between different ROS 2 versions, you shouldn't run the Editor or AWSIM binary with ROS 2 sourced.
Warning
Do not run the AWSIM, Unity Hub, or the Editor with ROS 2 sourced.
- Make sure that the terminal which you are using to run Unity Hub, Editor, or AWSIM doesn't have ROS 2 sourced.
- It is common to have ROS 2 sourced automatically with
~/.bashrcor~/.profile. Make sure it is not obscuring your working environment:- Running Unity Hub from the Ubuntu GUI menu takes the environment configuration from
~/.profile. - Running Unity Hub from the terminal uses the current terminal configuration from
~/.profileand~/.bashrc. - Running Unity Editor from the UnityHub inherits the environment setup from the Unity Hub.
- Running Unity Hub from the Ubuntu GUI menu takes the environment configuration from
- Make sure your Windows environment variables are ROS 2 free.
Unity installation
Info
AWSIM's Unity version is currently 2021.1.7f1
Follow the steps below to install Unity on your machine:
- Install UnityHub to manage Unity projects. Please go to Unity download page and download latest
UnityHub.AppImage.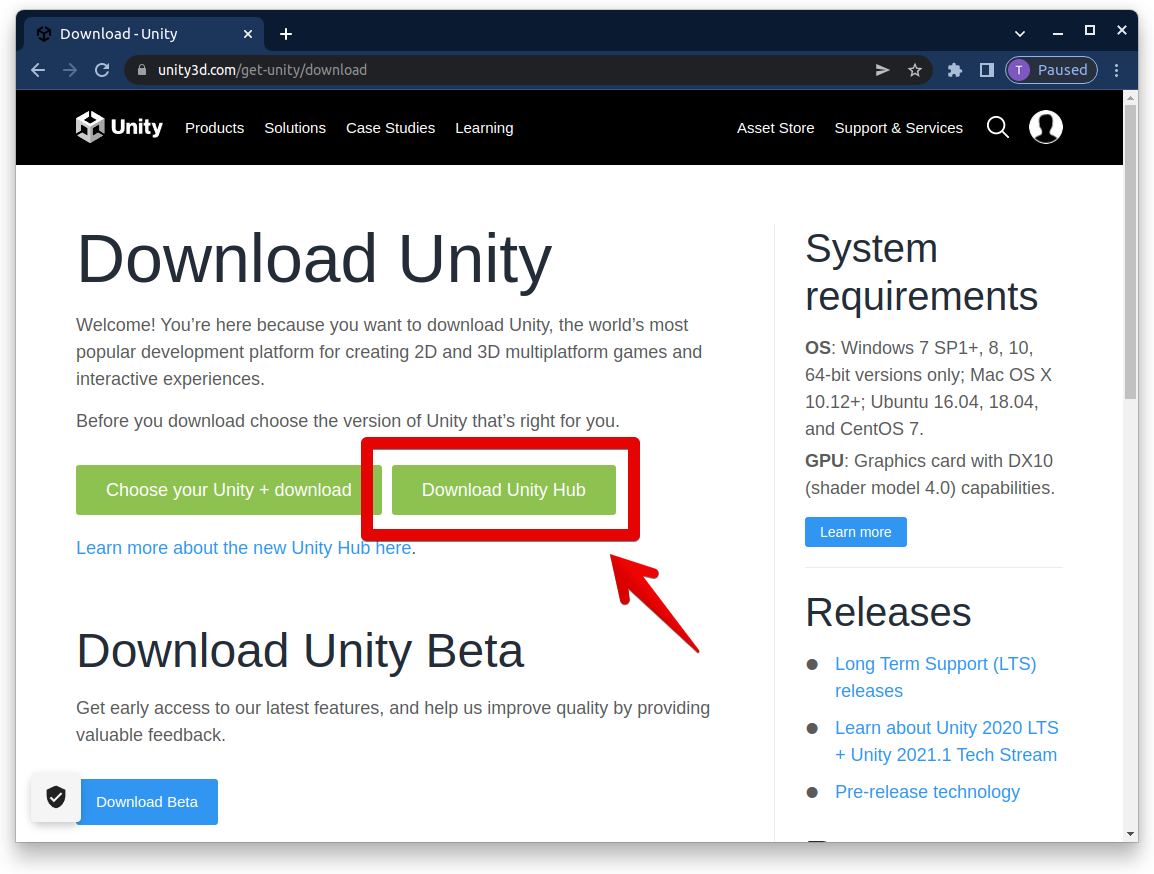
-
Install Unity 2021.1.7f1 via UnityHub.
- Open new terminal, navigate to directory where
UnityHub.AppImageis download and execute the following command:./UnityHub.AppImage - To install Unity Editor please proceed as shown on the images below

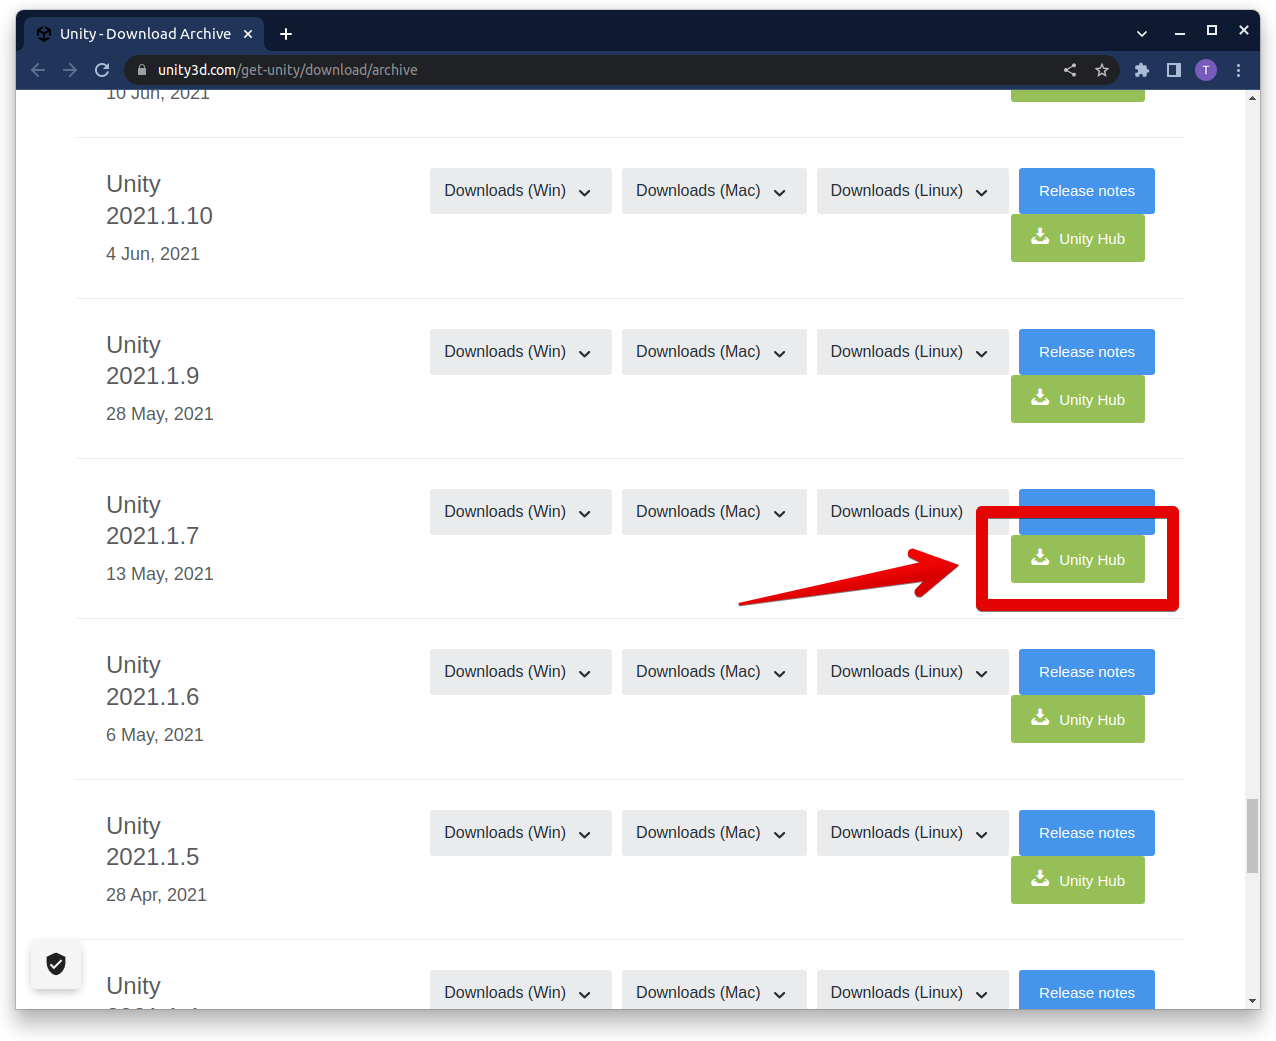
-
At this point, your Unity installation process should have started.
- *NOTE: If the installation process has not started after clicking the green button (image above), please copy the hyperlink (by rightclicking the button and selecting
Copy link address) and add it as a argument for Unity Hub app. An example command:./UnityHub.AppImage unityhub://2021.1.7f1/d91830b65d9b
- *NOTE: If the installation process has not started after clicking the green button (image above), please copy the hyperlink (by rightclicking the button and selecting
-
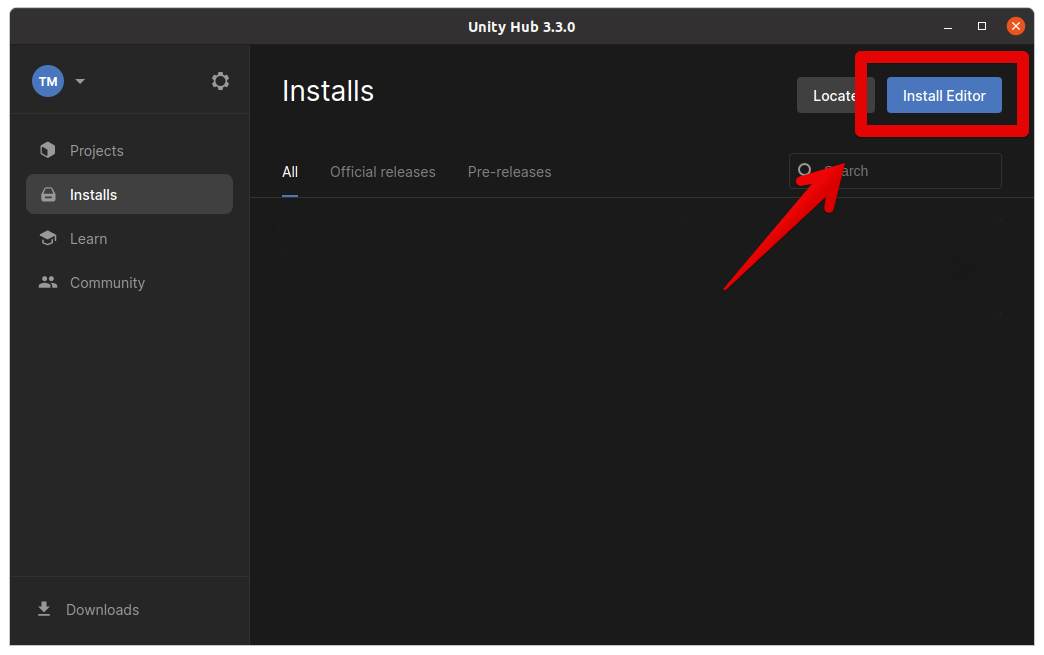
After successful installation the version will be available under the
Installstab in Unity Hub.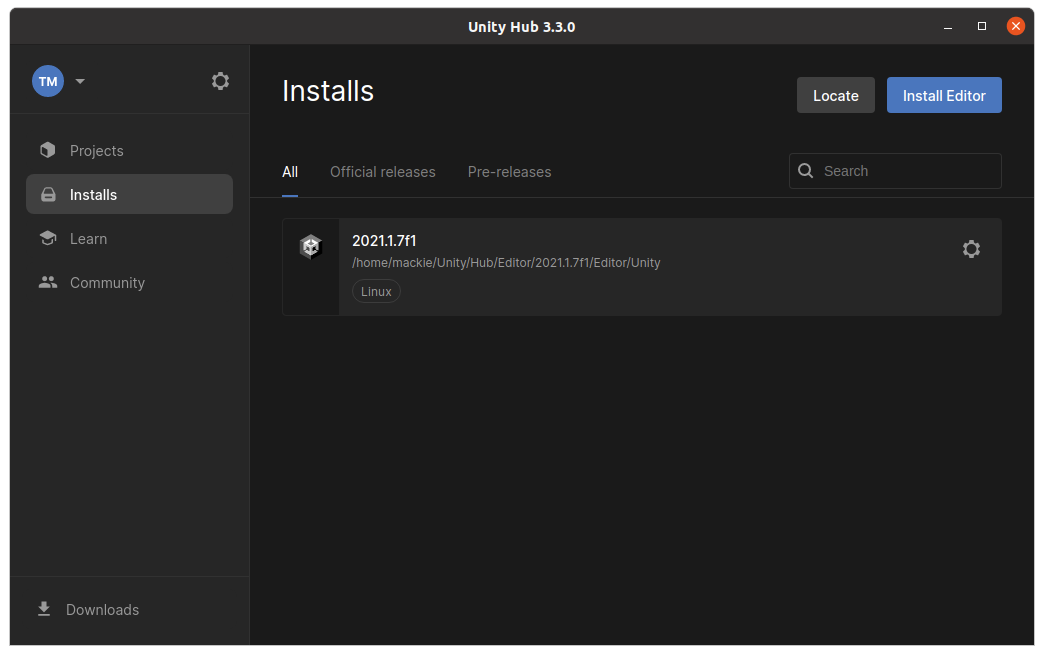
- Open new terminal, navigate to directory where
Open AWSIM project
To open the Unity AWSIM project in Unity Editor:
-
Make sure you have the AWSIM repository cloned and ROS 2 is not sourced.
git clone git@github.com:tier4/AWSIM.git -
Launch UnityHub.
./UnityHub.AppImageInfo
If you are launching the Unity Hub from the Ubuntu applications menu (without the terminal), make sure that system optimizations are set. To be sure, run the terminal at least once before running the Unity Hub. This will apply the OS settings.
-
Open the project in UnityHub
-
Click the
Openbutton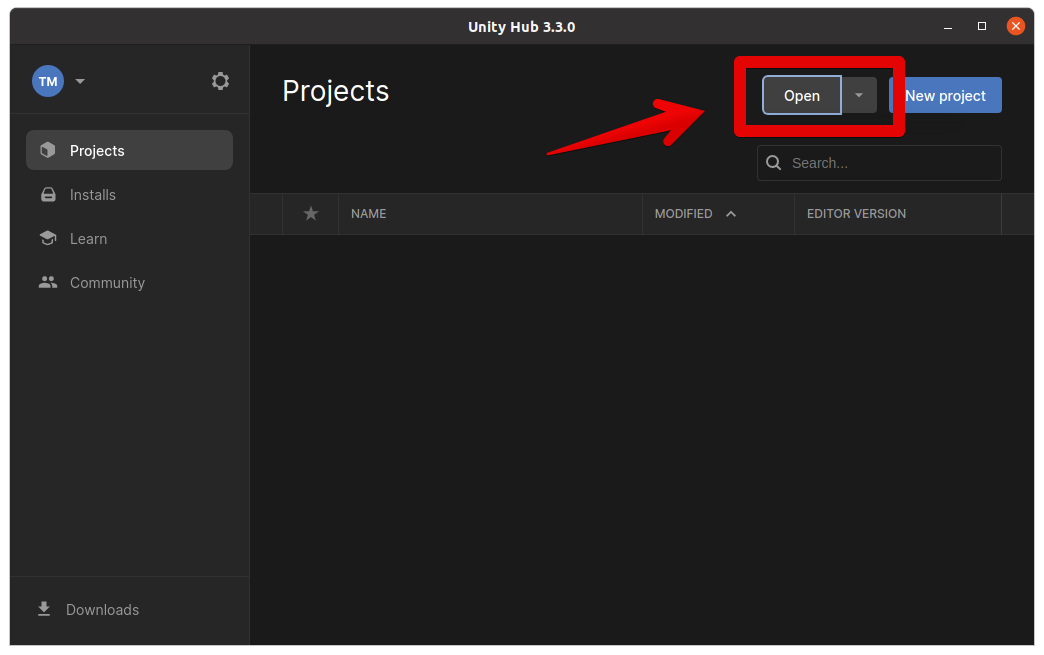
-
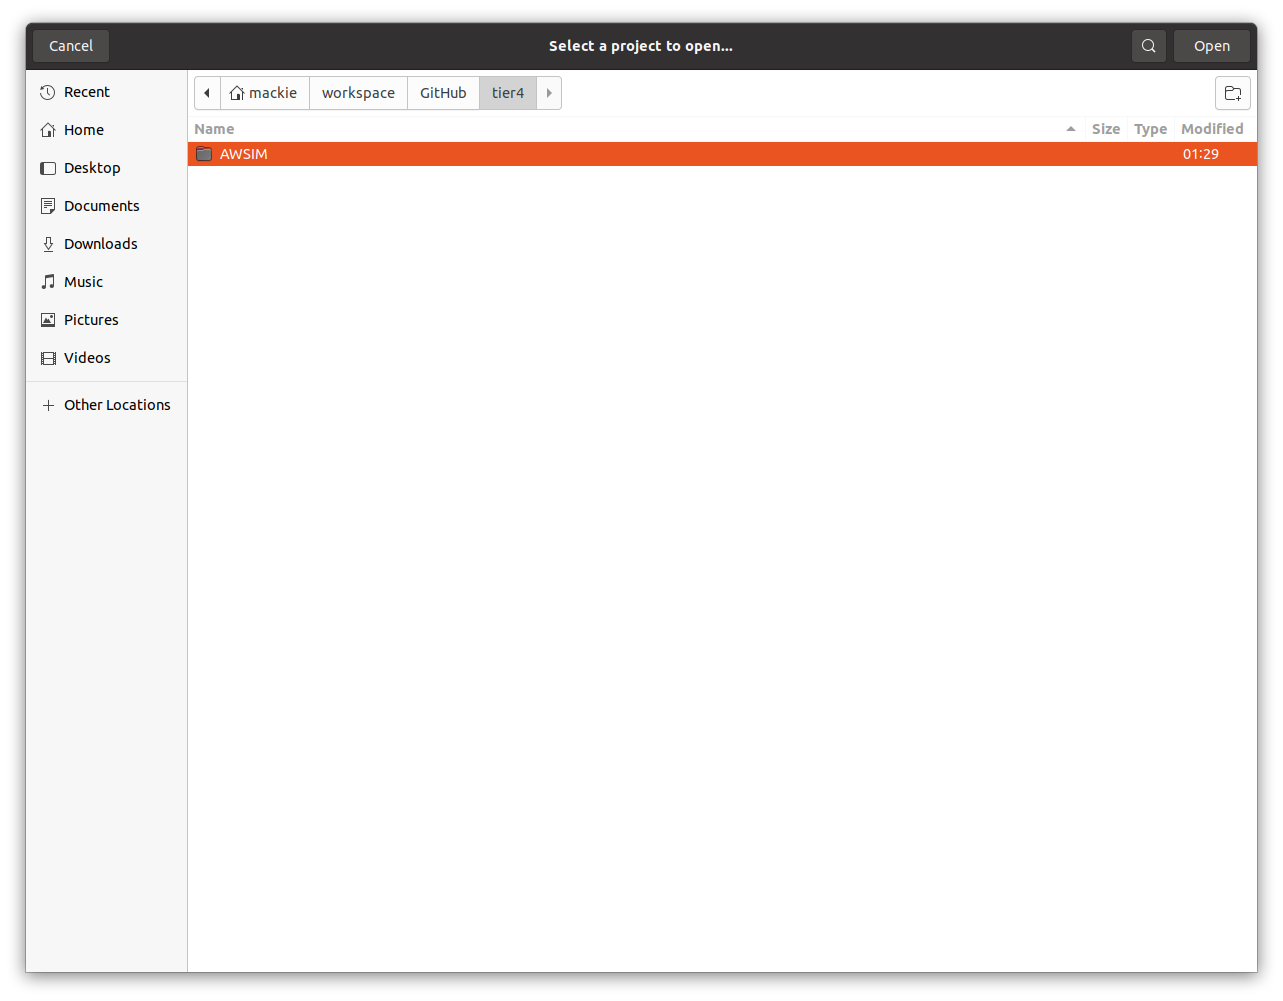
Navigate the directory where the AWSIM repository was cloned to
-
The project should be added to
Projectstab in Unity Hub. To launch the project in Unity Editor simply click theAWSIMitem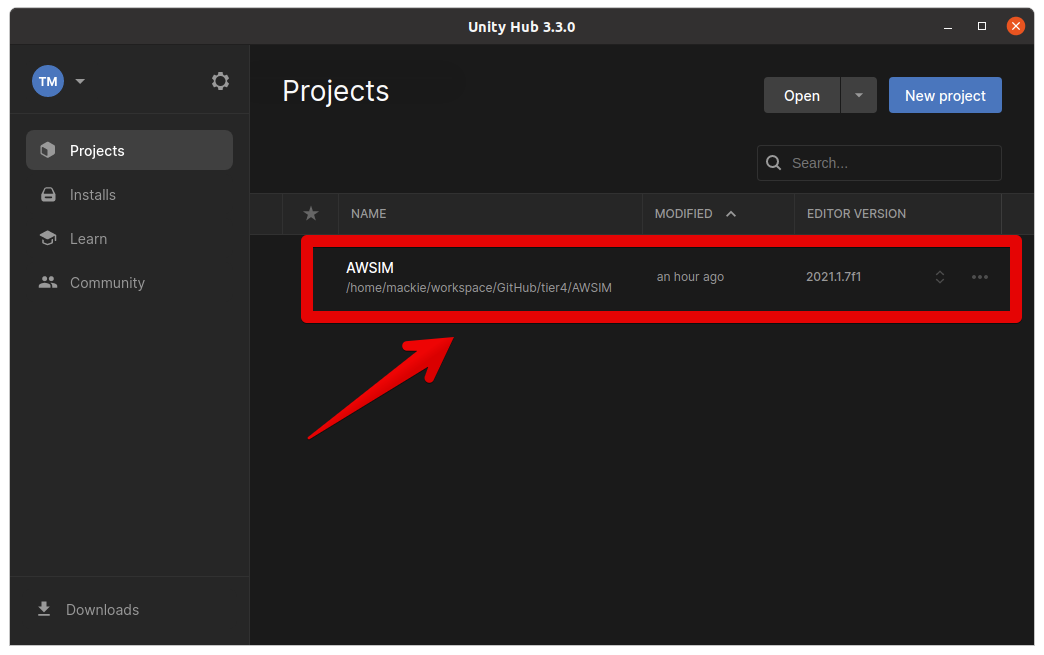
-
The project is now ready to use
-
-
Enter the AWSIM directory (make sure ROS 2 is not sourced).
cd AWSIM -
If your Unity Editor is in default location, run the project using the editor command.
~/Unity/Hub/Editor/2021.1.7f1/Editor/Unity -projectPath .Info
If your Unity Editor is installed in different location, please adjust the path accordingly.
Warning
If you get the safe mode dialog when starting UnityEditor, you may need to install openssl.
- download libssl
$ wget http://security.ubuntu.com/ubuntu/pool/main/o/openssl1.0/libssl1.0.0_1.0.2n-1ubuntu5.13_amd64.deb - install
sudo dpkg -i libssl1.0.0_1.0.2n-1ubuntu5.13_amd64.deb
Import external packages
To properly run and use AWSIM project in Unity it is required to download map package which is not included in the repository.
-
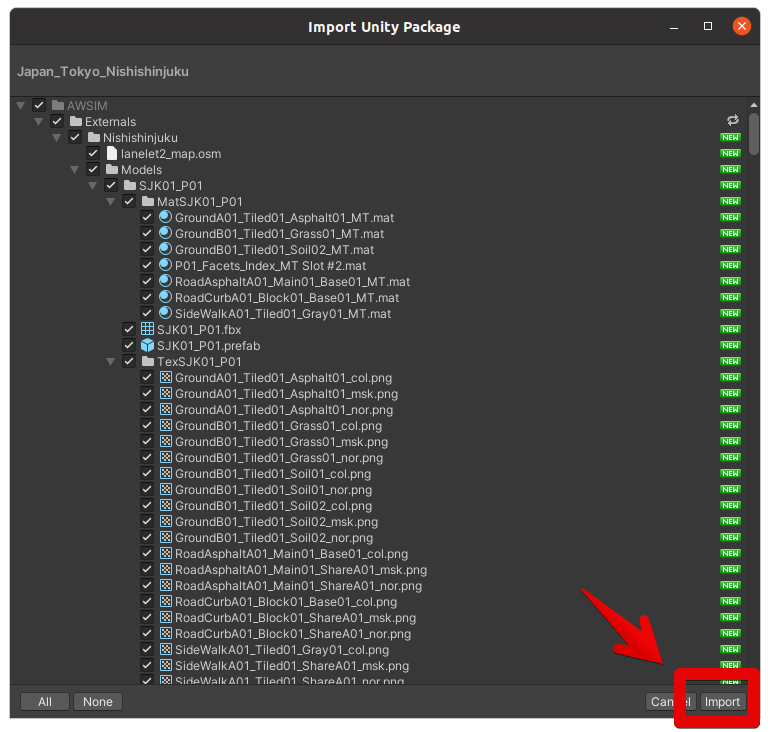
Download and import
Japan_Tokyo_Nishishinjuku.unitypackage_v2 -
In Unity Editor, from the menu bar at the top, select
Assets -> Import Package -> Custom Package...and navigate theJapan_Tokyo_Nishishinjuku.unitypackage_v2file.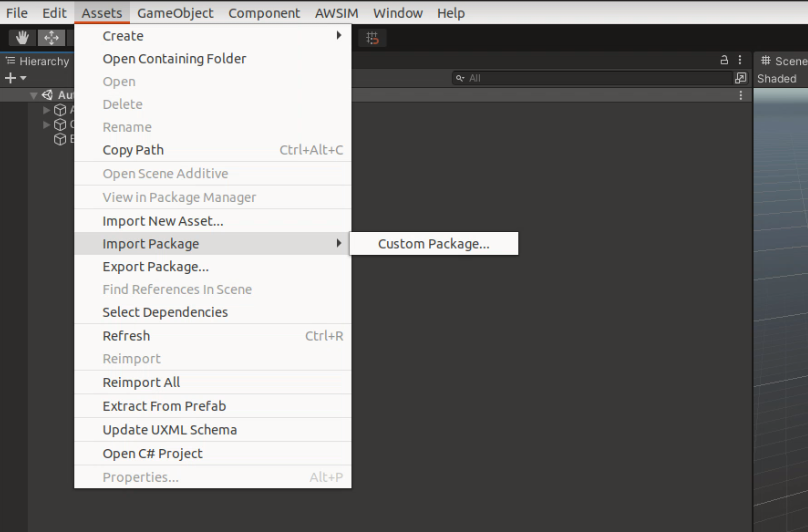
Nishishinjukupackage has been successfully imported underAssets/AWSIM/Externals/directory.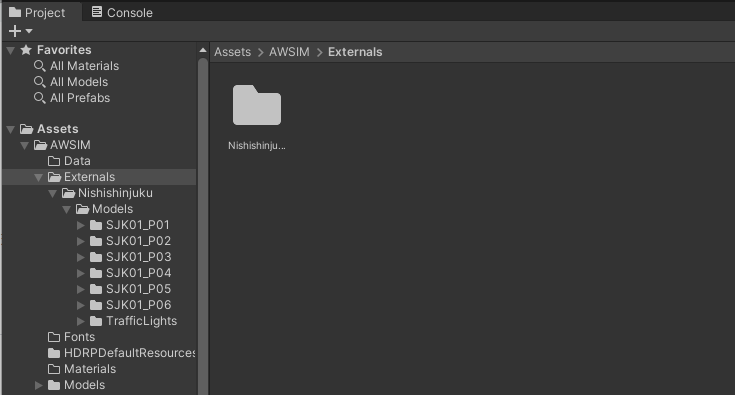
Info
The Externals directory is added to the .gitignore because the map has a large file size and should not be directly uploaded to the repository.
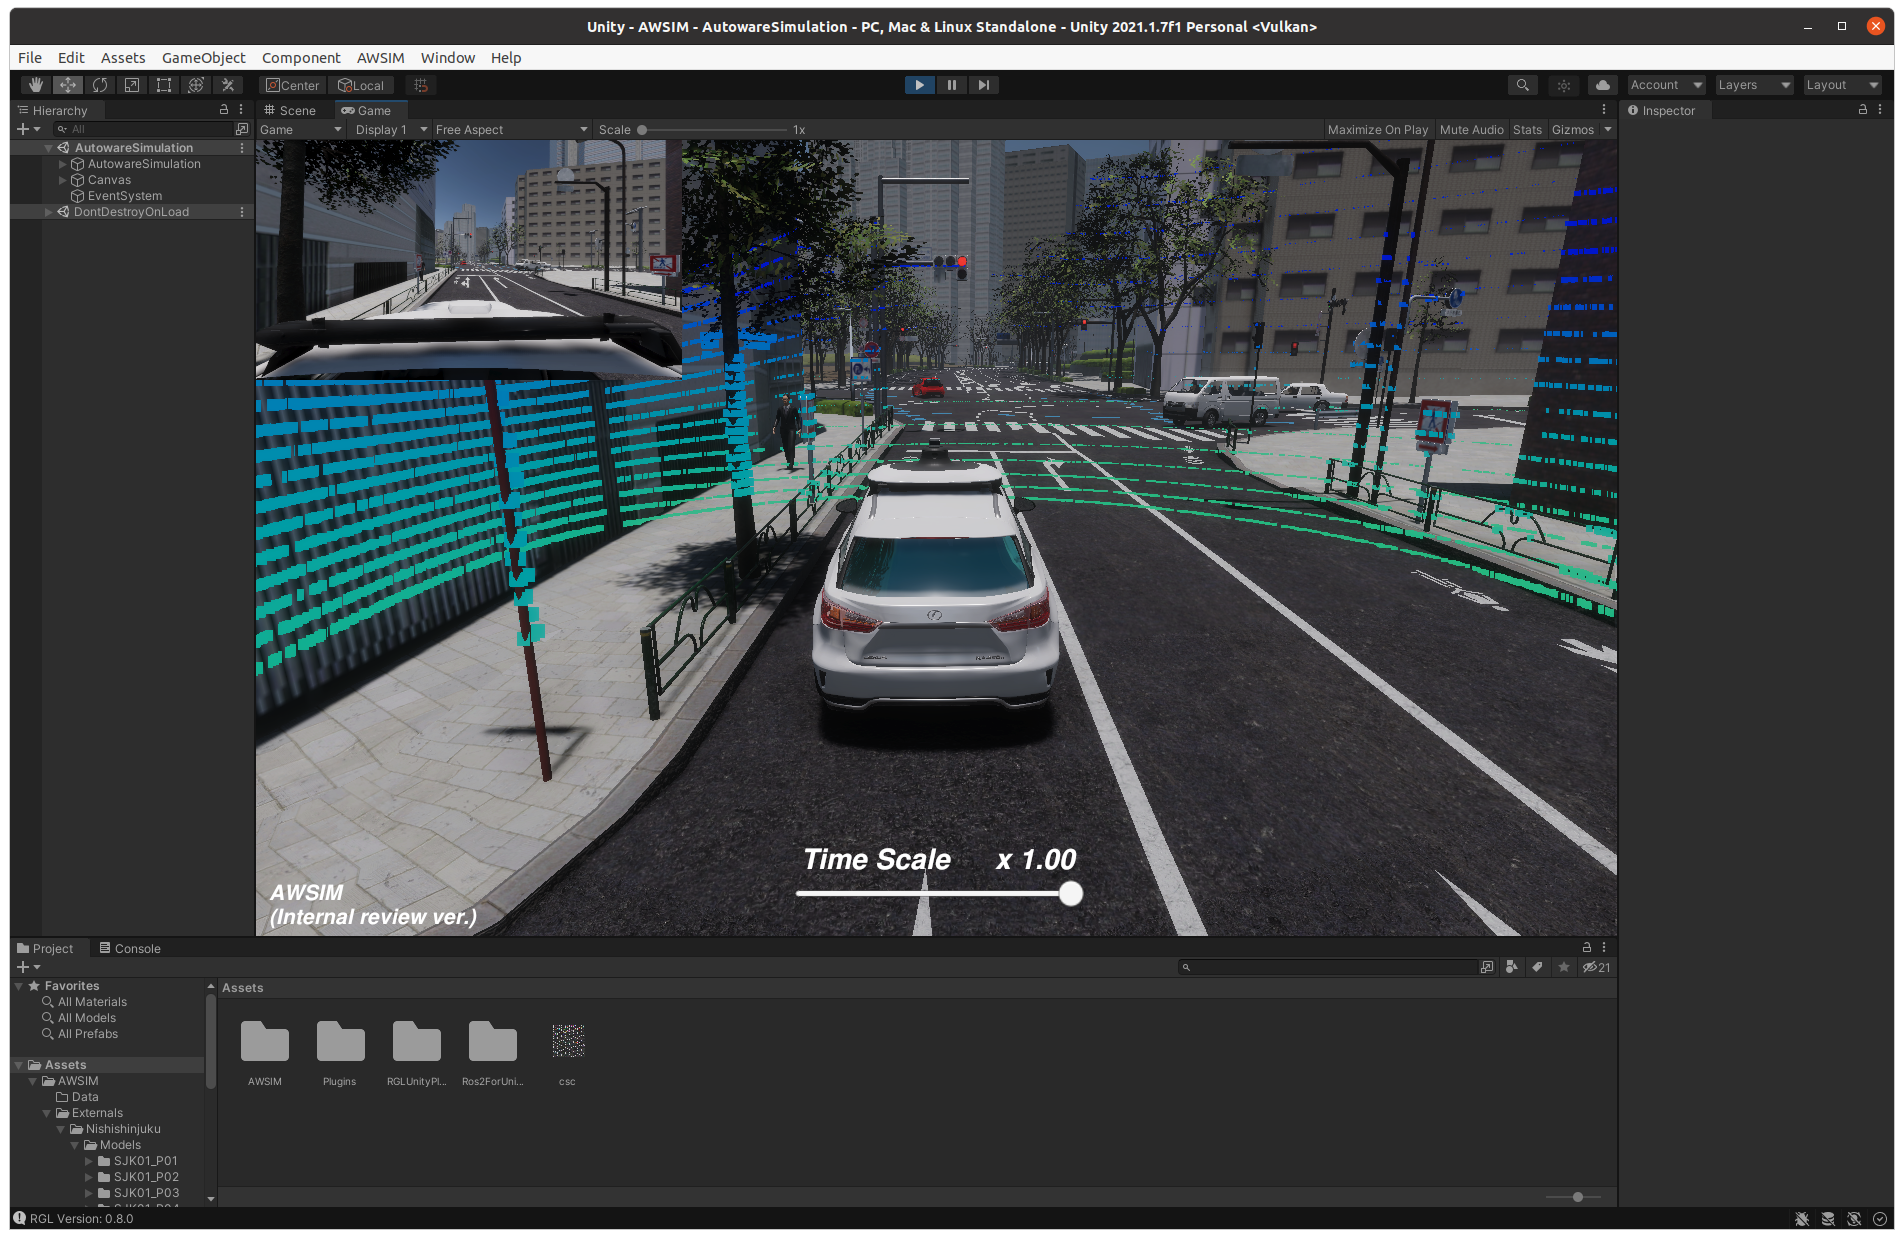
Run the demo in Editor
The following steps describe how to run the demo in Unity Editor:
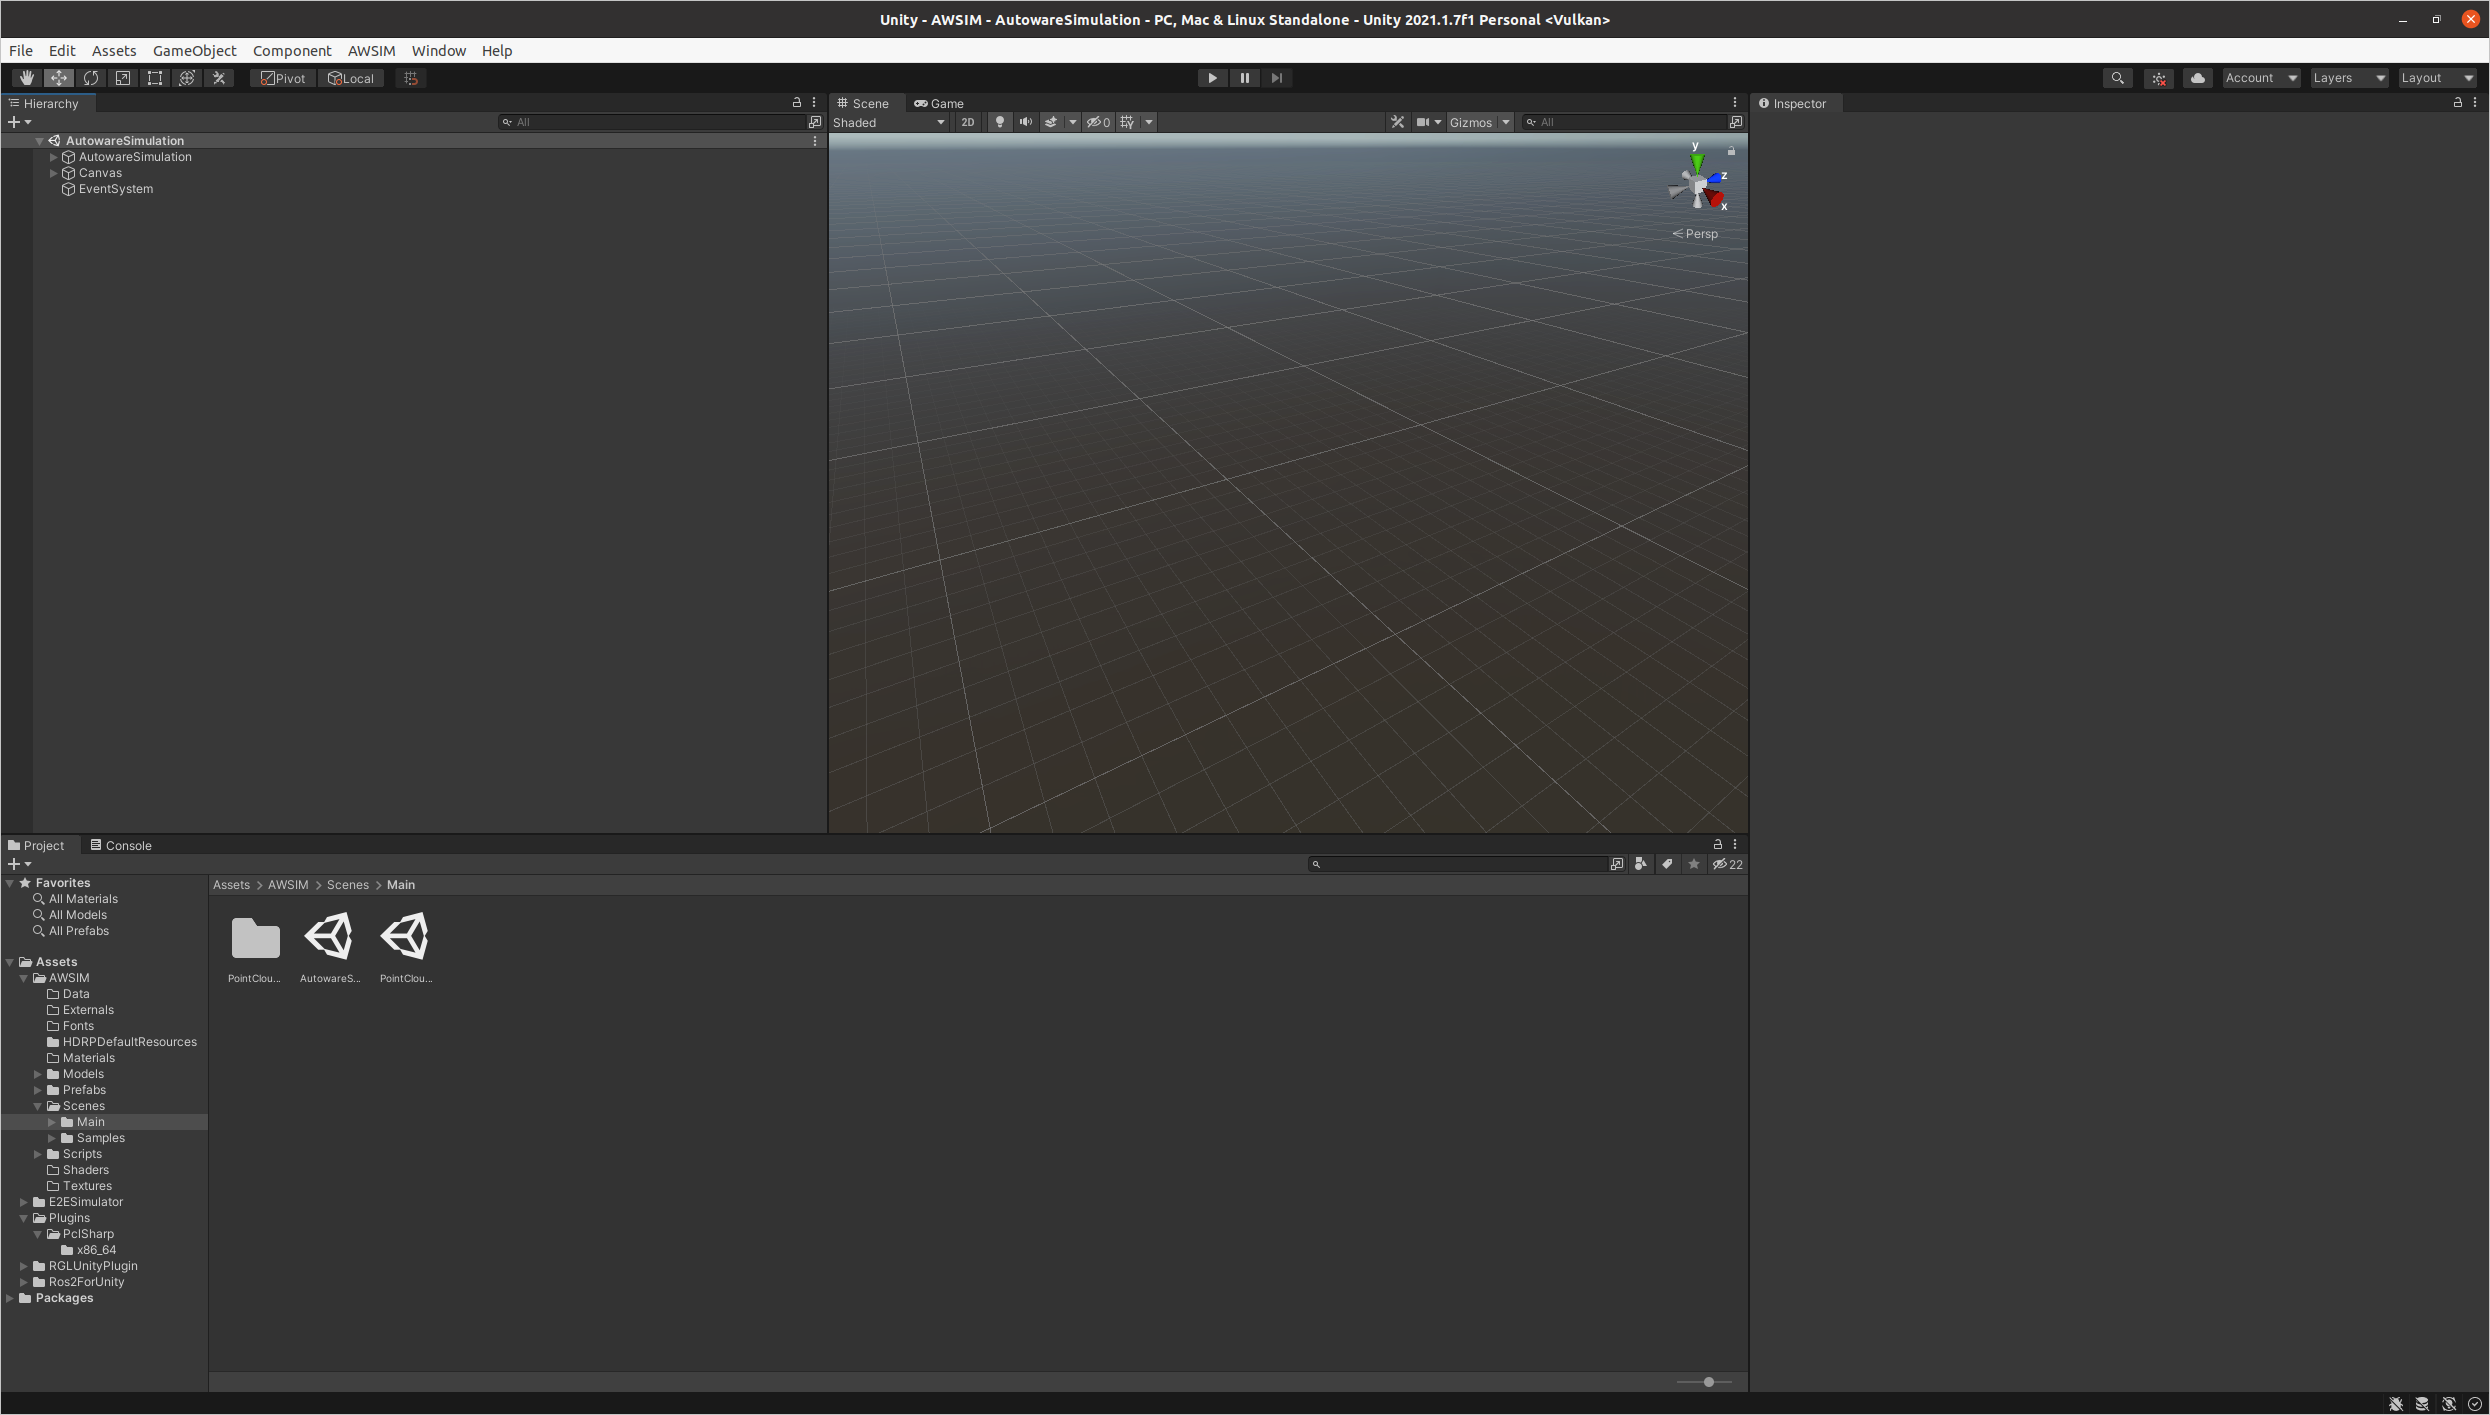
- Open the
AutowareSimulation.unityscene placed underAssets/AWSIM/Scenes/Maindirectory - Run the simulation by clicking
Playbutton placed at the top section of Editor.