Add a new LiDAR
RGLUnityPlugin (RGL) comes with a number of the most popular LiDARs model definitions and ready-to-use prefabs. However, there is a way to create your custom LiDAR. This section describes how to add a new LiDAR model that works with RGL, then create a prefab for it and add it to the scene.
Supported LiDARs
Not all lidar types are supported by RGL. Unfortunately, in the case of MEMs LiDARs, there is a non-repetitive phenomenon - for this reason, the current implementation is not able to reproduce their work.
1. Add a new LiDAR model
The example shows the addition of a LiDAR named NewLidarModel.
To add a new LiDAR model, perform the following steps:
-
Navigate to
Assets/RGLUnityPlugin/Scripts/LidarModels. -
Add its name to the
LidarModels.csat the end of the enumeration. The order of enums must not be changed to keep existing prefabs working.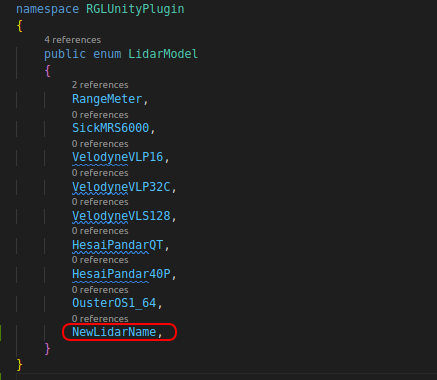
-
Now, it is time to define the laser (also called a channel) distribution of the LiDAR.
Info
If your LiDAR:
- has a uniform laser distribution
- has the equal range for all of the lasers
- fire all of the rays (beams) at the same time
You can skip this step and use our helper method to generate a simple uniform laser array definition (more information in the next step).
-
Laser distribution is represented by
LaserArrayconsists of:-
centerOfMeasurementLinearOffsetMm- 3D translation from the game object's origin to LiDAR's origin. Preview in 2D: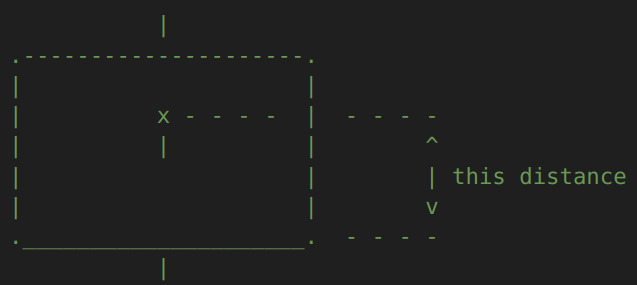
-
focalDistanceMm- Distance from the sensor center to the focal point where all laser beams intersect.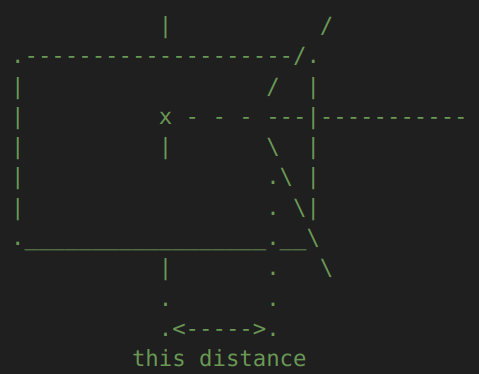
-
lasers- array of lasers (channels) with a number of parameters:horizontalAngularOffsetDeg- horizontal angle offset of the laser (Azimuth)verticalAngularOffsetDeg- vertical angle offset of the laser (Elevation)verticalLinearOffsetMm- vertical offset of the laser (translation from origin)ringId- Id of the ring (in most cases laser Id)timeOffset- time offset of the laser firing in milliseconds (with reference to the first laser in the array)minRange- minimum range of the laser (set if lasers have different ranges)maxRange- maximum range of the laser (set if lasers have different ranges)
-
-
To define a new laser distribution create a new class in the
LaserArrayLibrary.cs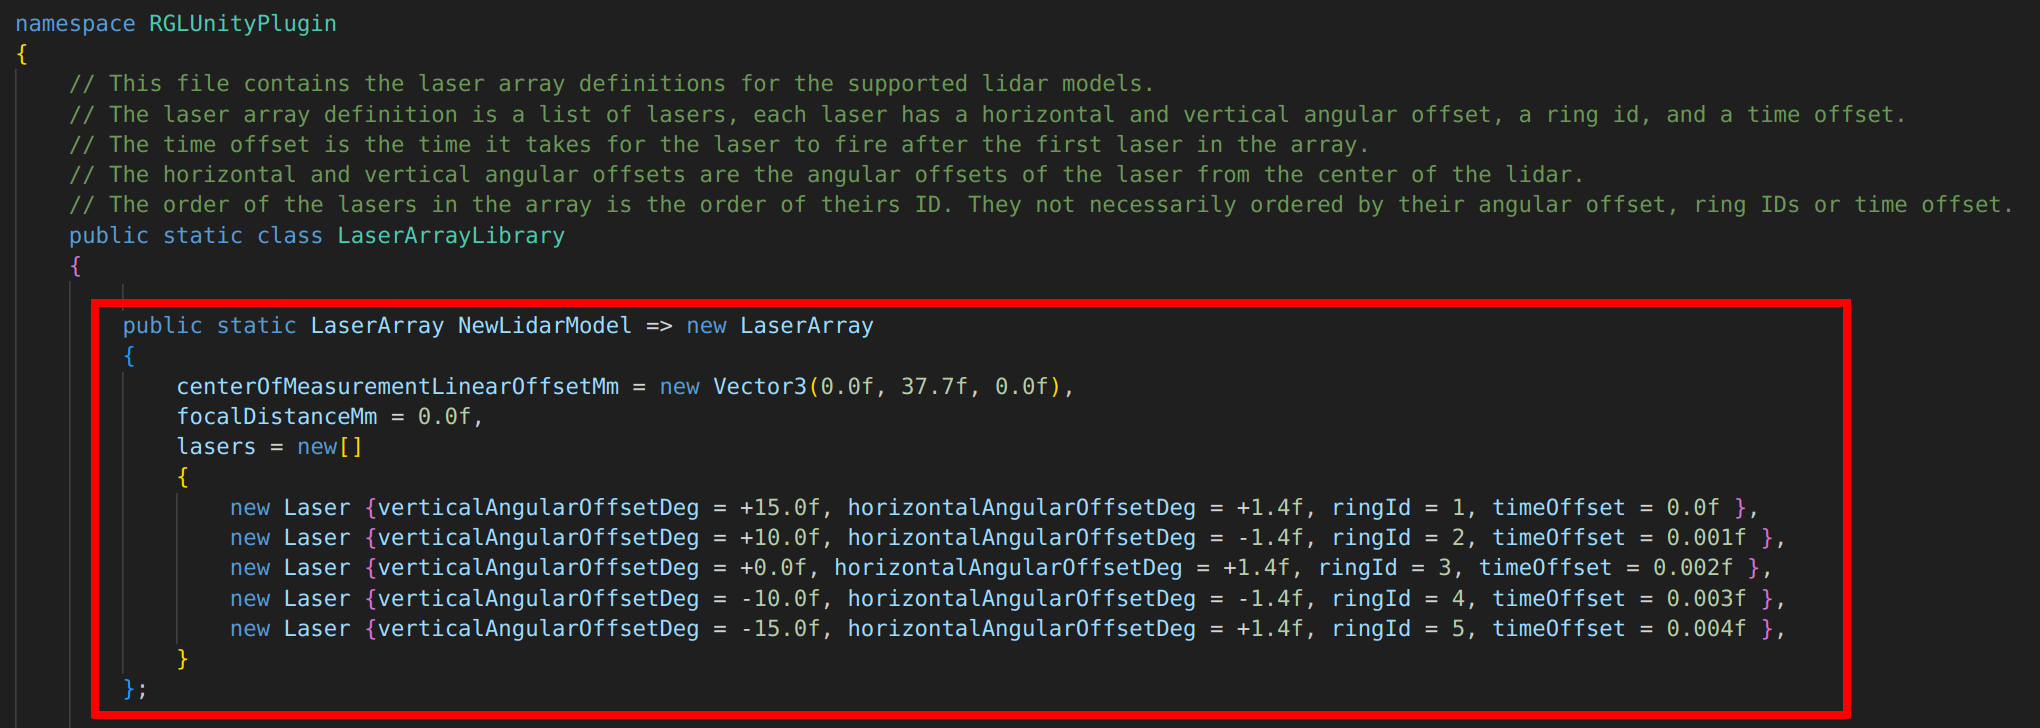
- Add a new public static instance of
LaserArraywith the definition.
In this example,
NewLidarModellaser distribution consists of 5 lasers with- elevations: 15, 10, 0, -10, -15 degrees - azimuths: 1.4, -1.4, 1.4, -1.4, 1.4 degrees - ring Ids: 1, 2, 3, 4, 5 - time offsets: 0, 0.01, 0.02, 0.03, 0.04 milliseconds - an equal range that will be defined laterCoordinate system
Keep in mind that Unity has a left-handed coordinate system, while most of the LiDAR's manuals use a right-handed coordinate system. In that case, reverse sign of the values of the angles.
- Add a new public static instance of
-
-
The last step is to create a LiDAR configuration by adding an entry to
LidarConfigurationLibrary.cs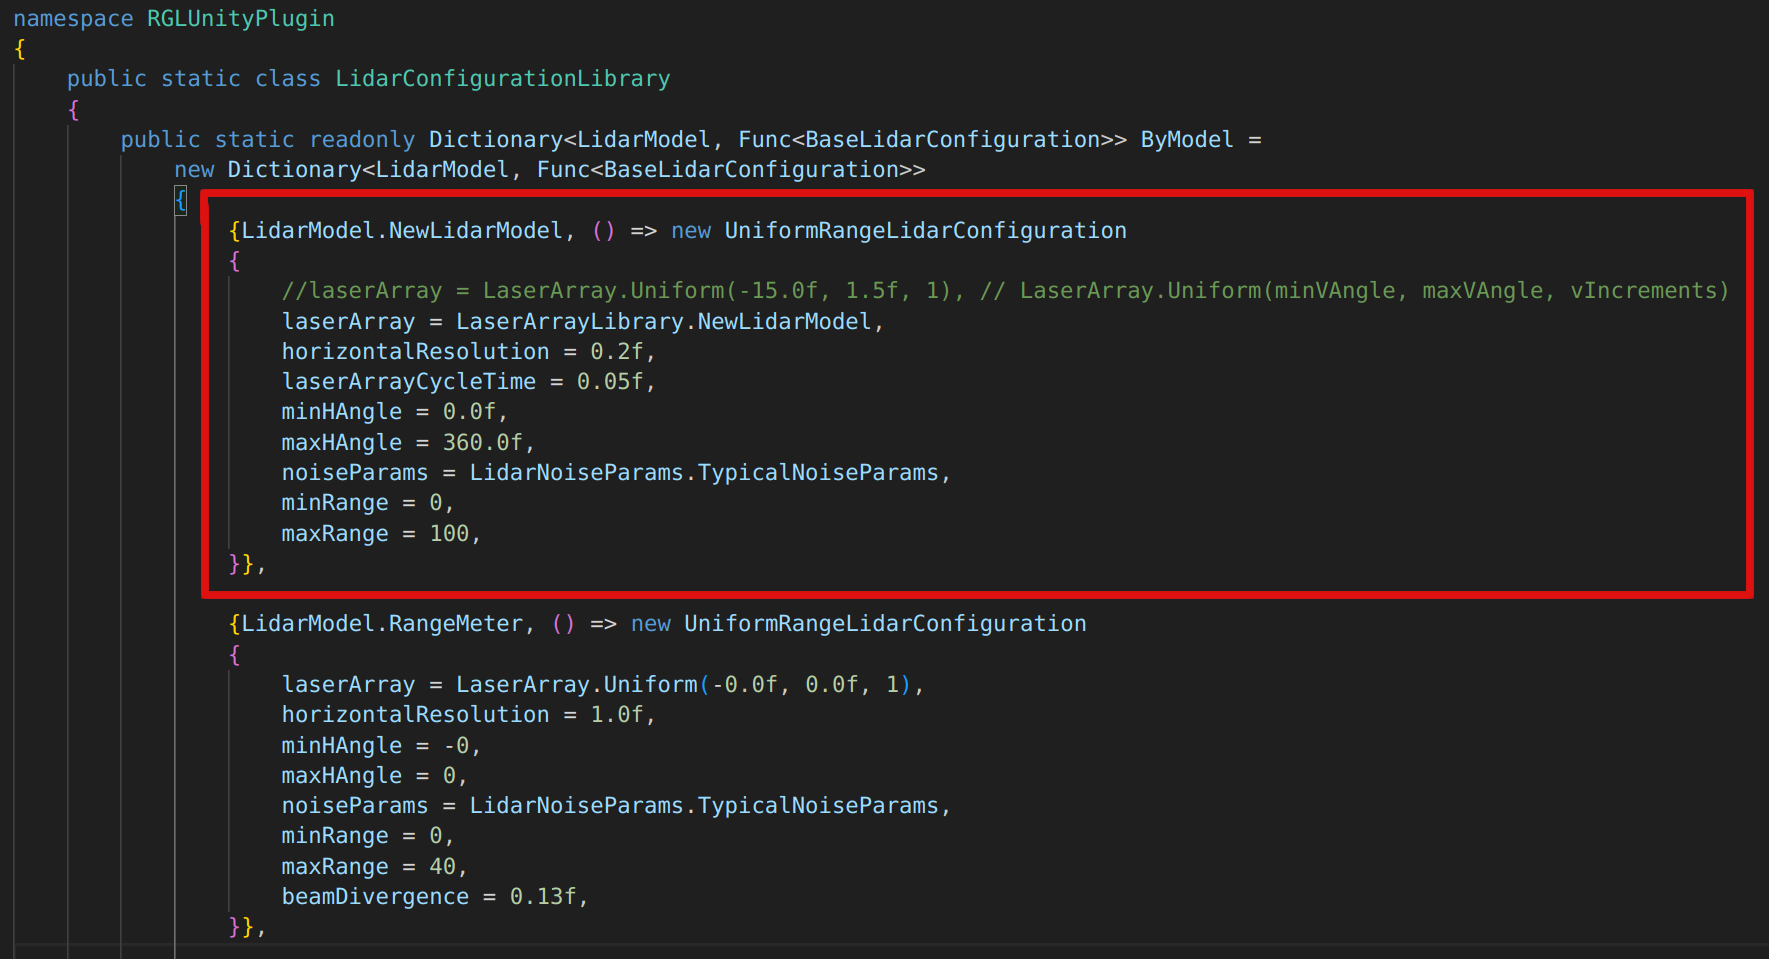
Add a new item to the
ByModeldictionary that collects LiDAR model enumerations with theirBaseLidarConfigurationchoosing one of the implementations:UniformRangeLidarConfiguration- lidar configuration for uniformly distributed rays along the horizontal axis with a uniform range for all the rays (it containsminRangeandmaxRangeparameters additionally)LaserBasedRangeLidarConfiguration- lidar configuration for uniformly distributed rays along the horizontal axis with ranges retrieved from lasers description- Or create your custom implementations in
LidarConfiguration.cslike:HesaiAT128LidarConfigurationHesaiQT128C2XLidarConfigurationHesaiPandar128E4XLidarConfiguration
Lidar configuration parameters descrition
Please refer to this section for the detailed description of all configuration parameters.
-
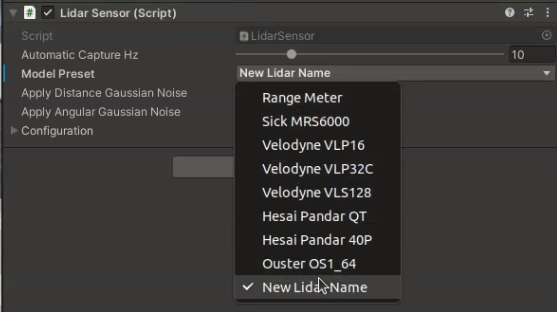
Done. New LiDAR preset should be available via Unity Inspector.
Frame rate of the LiDAR can be set in the
Automatic Capture Hzparameter.Note: In the real-world LiDARs, frame rate affects horizontal resolution. Current implementation separates these two parameters. Keep in mind to change it manually.
2. Create new LiDAR prefab
- Create an empty object and name it appropriately according to the LiDAR model.
- Attach script
LidarSensor.csto created object. - Set the new added LiDAR model in
Model Presetfield, check if the configuration loads correctly. You can now customize it however you like. - (Optional) Attach script
PointCloudVisualization.csfor visualization purposes. - For publishing point cloud via ROS2 attach script
RglLidarPublisher.csscript to created object. - Set the topics on which you want the data to be published and their frame.
- Save the prefab in the project.
3. Test your prefab
- Create a new scene (remember to add the
SceneManager) or use one of the existing sample scenes. -
Add the prepared LiDAR prefab by drag the prefab file and drop it into a scene.
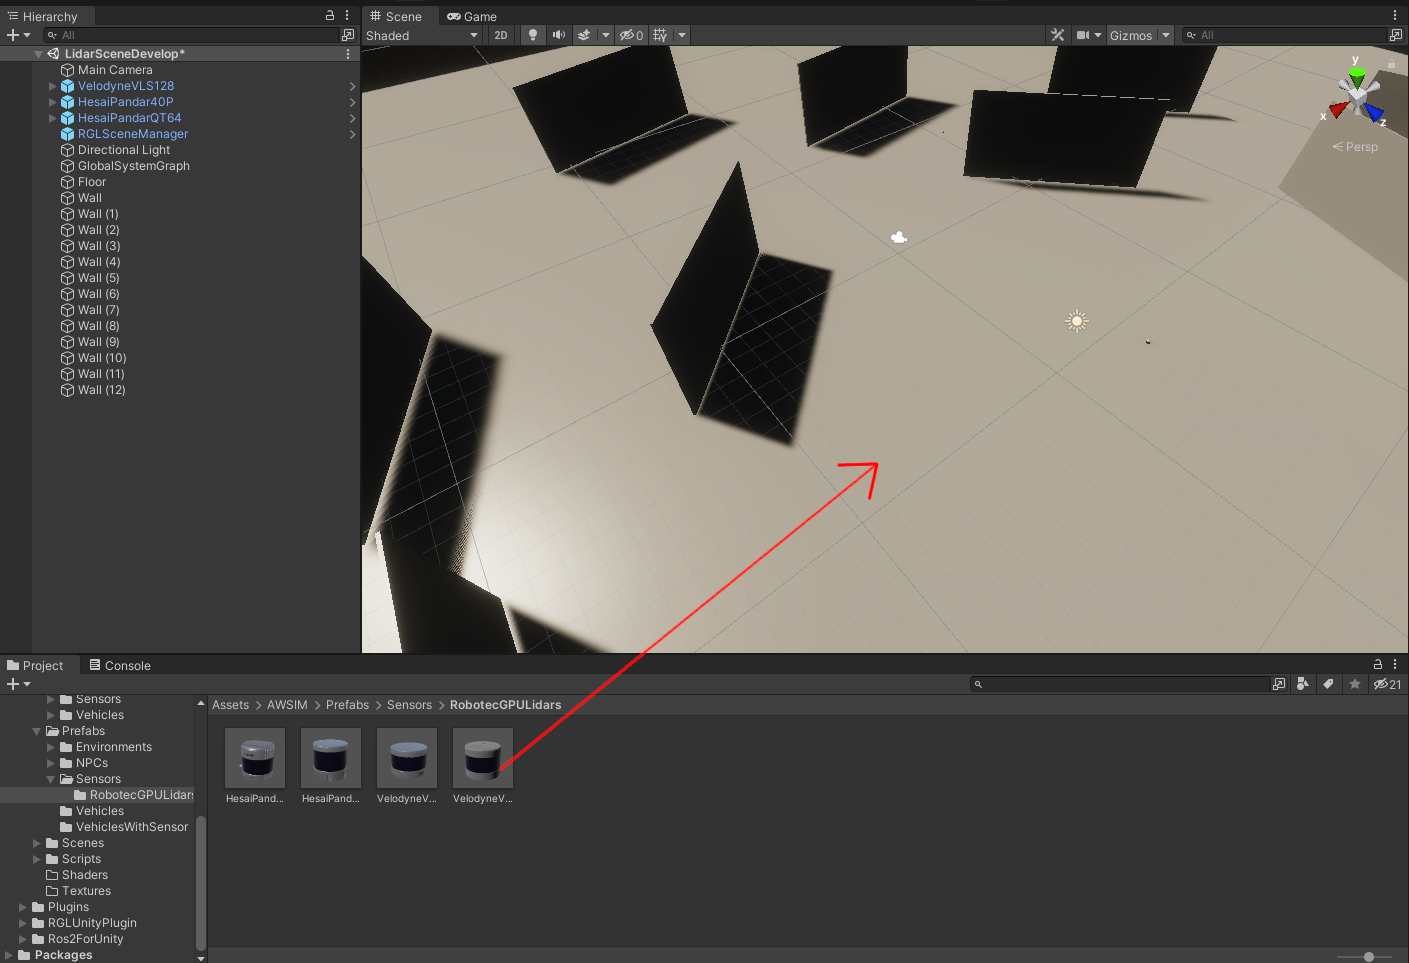
-
A LiDAR GameObject should be instantiated automatically
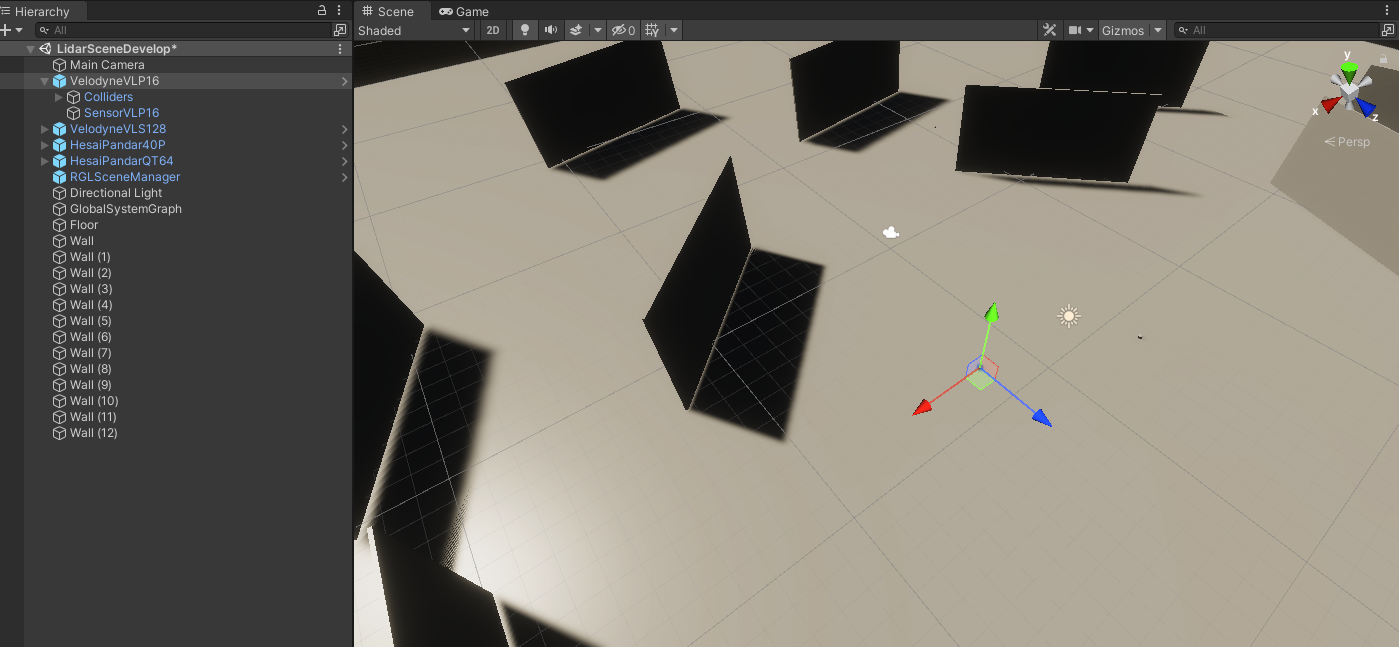
-
Now you can run the scene and check how your LiDAR works.
Success
We encourage you to develop a vehicle using the new LiDAR you have added - learn how to do this here.