Add Visual Elements
Your EgoVehicle needs many individual visual parts.
Below we will add all needed visual elements.
First in EgoVehicle Object add a child Object called Models.
Inside Models Object we will add all visual models of our EgoVehicle.
Add a Body
First you will need to add a Body of your Vehicle.
It will contain many parts, so first lets create a Body parent Object.
Next we will need to add Car Body
-
Add a child Object
BodyCarto theBodyObject.
-
To the
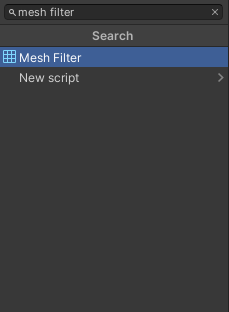
BodyCarObject add a Mesh Filter.Click on the 'Add Component' button, search for
Mesh Filterand select it. Next search for mesh of your vehicle and select it in theMeshfield.
-
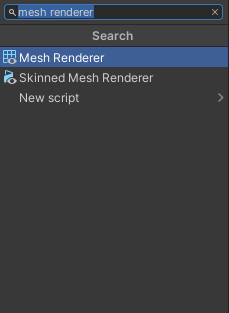
To the
BodyCarObject add a Mesh Renderer.Click on the 'Add Component' button, search for
Mesh Filterand select it
-
Specify Materials.
You need to specify what materials will be used for rendering your
EgoVehiclemodel. Do this by adding elements to theMaterialslist and selecting the materials you wish to use as shown below.
Add as many materials as your model has sub-meshes.
Tip
When you add too many materials, meaning there will be no sub-meshes to apply these materials to, you will see this warning. In such a case please remove materials until this warning disappears.

Add interactive Body parts
In this step we will add the following parts
- Break light
- Reverse Light
- Right Turn Signal
- Left Turn Signal
- (optional) other visual elements required specifically by your Vehicle.
Info
It may seem like all of the elements above can be parts of the Body mesh, but it is important for these parts to be separate, because we need to be able to make them interactive (e.g. flashing turn signals).
Other good reason for having different meshes for Vehicle parts is that you have a Vehicle model, but for the simulation you need to add e.g. a roof rack with sensors - which can be achieved by adding more meshes.
Note
We will illustrate this step only for Break Light, but you should repeat this step of the tutorial for each element of the list above.
-
Add a child Object to the
BodyObject.
-
Add a Mesh Filter and select the mesh (the same as in section before).
-
Add a Mesh Renderer and select the materials (the same as in section before).
Add Wheels
In this step we will add individual visuals for every wheel. This process is very similar to the one before.
-
Add a child Object to the
ModelsObject calledWheelVisuals.
Note
In this tutorial we will add only one wheel, but you should repeat the step for all 4 wheels. That is, follow the instructions that follow this message for every wheel your Vehicle has.
- Front Left Wheel
- Front Right Wheel
- Rear Left Wheel
- Rear Right Wheel
-
Add a child Object to the
WheelVisualsObject calledFrontLeftWheel.
-
Add a child Object to the
FrontLeftWheelObject calledWheelFrontL. This Object will contain the actual wheel part.
-
Add a Mesh Filter and select the wheel mesh.

-
Add a Mesh Renderer and select the wheel materials.
-
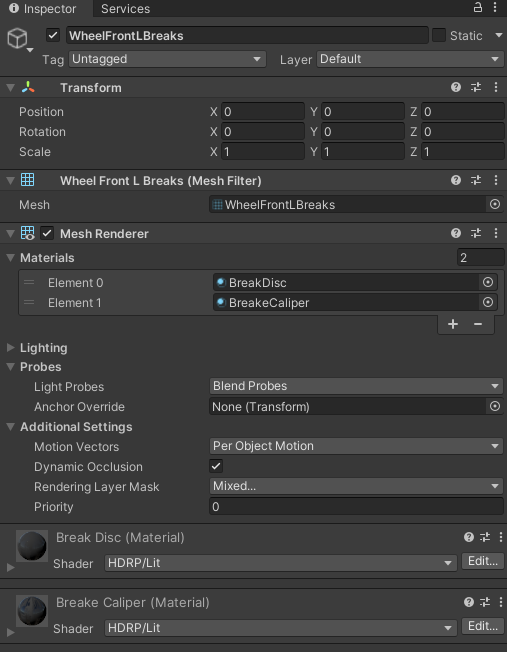
Repeat the steps before to add Breaks.
The same way you have added the
WheelFrontLObject now add theWheelFrontLBreaks. Naturally you will have to adjust the mesh and materials used as they will be different for breaks than for the wheel.Your final break configuration should look similar to the one following.
-
Set the
FrontLeftWheelparent Object transformation to position the wheel in correct place.
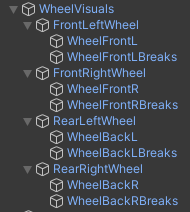
Successful configuration
If you have done everything right your WheelVisuals Object should look similar to the one following.
Move the models
The last step to correctly configure Vehicle models is to shift them so that the EgoVehicle origin is in the center of fixed axis.
This means you need to shift the whole Models Object accordingly (change the position fields in transformation).
Tip
Add a dummy Object as a child to the EgoVehicle Object (the same as in steps before) so it is located in the origin of the EgoVehicle.
Now move Models around relative to the dummy - change position in the Inspector view.
The dummy will help you see when the fixed axis (in case of the Lexus from example it is the rear axis) is aligned with origin of EgoVehicle.
In the end delete the dummy Object as it is no longer needed.