NPCVehicle
Introduction
NPCVehicle is a non-playable object that simulates a vehicle that is stationary or moving around the scene.
It can move on roads, more specifically TrafficLanes, thanks to the use of TrafficSimulator - which you can read more about here.
Vehicles moving on the scene take into account each other - avoiding collisions, follow traffic lights and have an implemented mechanism of yielding the right of way.
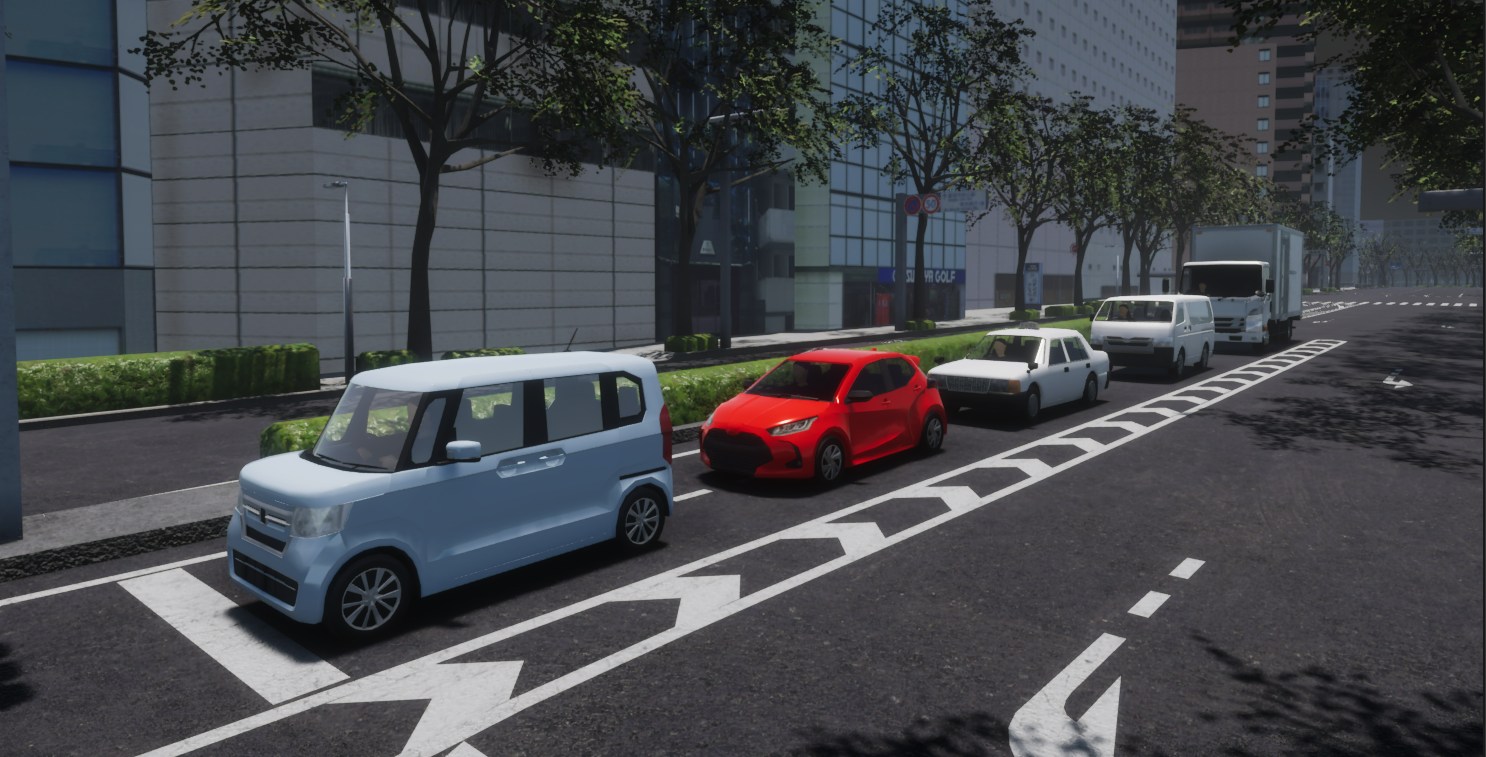
Sample scene
If you would like to see how NPCVehicle works or run some tests, we encourage you to familiarize yourself with the NPCVehicleSample default scene described in this section.
Ego Vehicle
If you are interested in the most important vehicle on the scene - Ego Vehicle, we encourage you to read this section.
Prefabs and Fbxs
Prefabs can be found under the following path:
Assets/AWSIM/Prefabs/NPCs/Vehicles/*
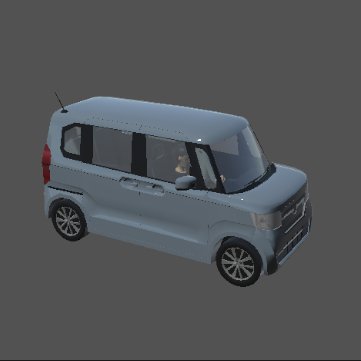
The table shows the available prefabs of the vehicles:
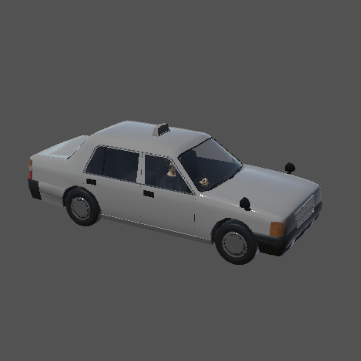
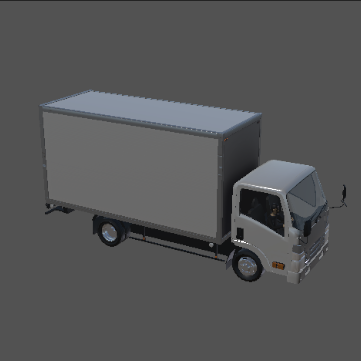
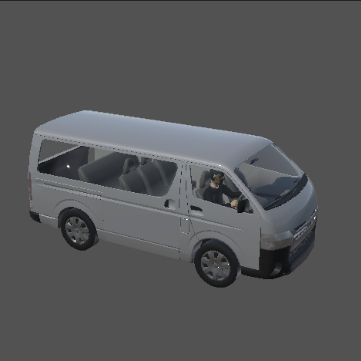
| Hatchback | SmallCar | Taxi | Truck | Van | |
|---|---|---|---|---|---|
| Appearance | 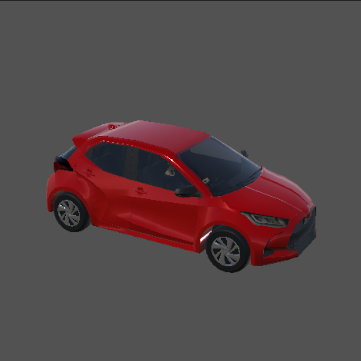 |
 |
 |
 |
 |
| Prefab | Hatchback.prefab |
SmallCar.prefab |
Taxi-64.prefab |
Truck_2t.prefab |
Van.prefab |
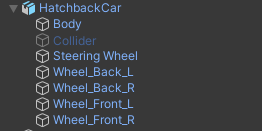
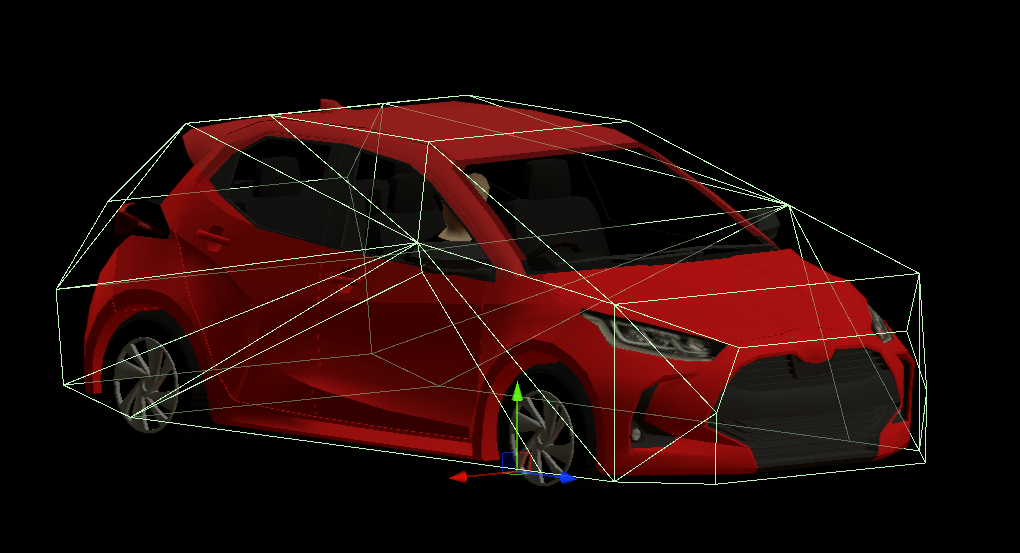
NPCVehicle prefab has the following content:

As you can see, it consists of 2 parents for GameObjects: Visuals - aggregating visual elements, Colliders - aggregating colliders and single object CoM.
All objects are described in the sections below.
Visual elements
Prefabs are developed using models available in the form of *.fbx files.
For each vehicle, the visuals elements and LOD were loaded from the appropriate *.fbx file.
The LOD is always added as components of the main-parent GameObject in prefab, while the visual elements of the model are aggregated and added in object Visuals.
*.fbx file for each vehicle is located in the appropriate Models directory for the vehicle under the following path:
Assets/AWSIM/Models/NPCs/Vehicles/<vehicle_name>/Models/<vehicle_name>.fbx
As you can see, the additional visual element is Driver.
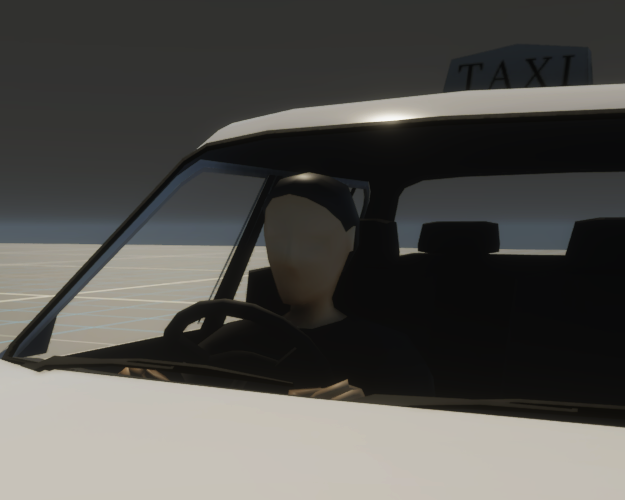
It was also loaded from the *.fbx file which can be found under the following path:
Assets/AWSIM/Models/NPCs/Vehicles/Driver/Model/Driver.fbx
Vehicle fbx
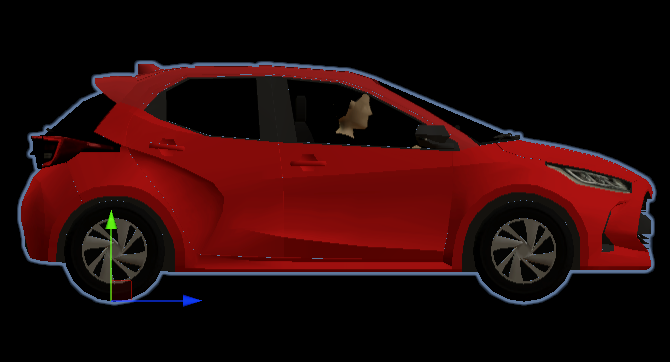
The content of a sample *.fbx file is presented below, all elements except Collider have been added to the prefab as visual elements of the vehicle.
Collider is used as the Mesh source for the Mesh Collider in the BodyCollider object.
 .
.
Link
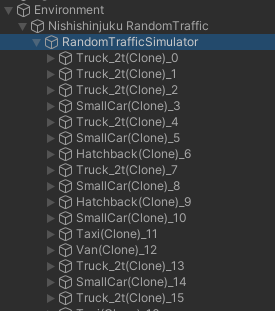
The default scene does not have vehicles implemented in fixed places, but they are spawned by RandomTrafficSimulator which is located in the Environment prefab.
Therefore, before starting the simulation, no NPCVehicle object is on the scene.
When you run the simulation, you can see objects appearing as children of RandomTrafficSimulator:
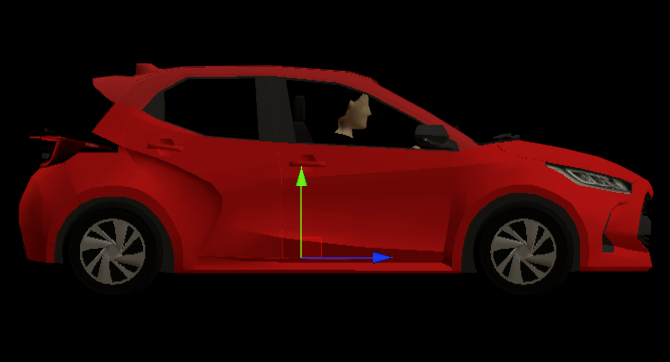
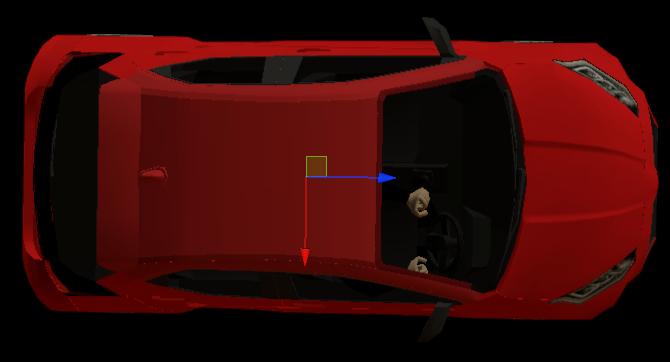
In each NPCVehicle prefab, the local coordinate system of the vehicle (main prefab link) should be defined in the axis of the rear wheels projected onto the ground - in the middle of the distance between them.
This aspect holds significance when characterizing the dynamics of the object, as it provides convenience in terms of describing its motion and control.
Components
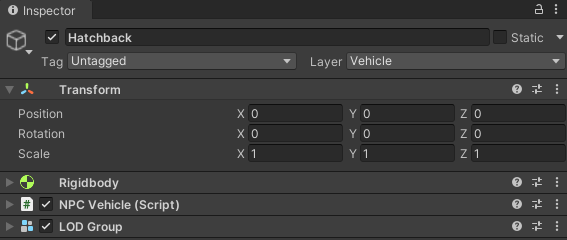
There are several components responsible for the full functionality of NPCVehicle:
- LOD Group - provides level of detail configuration for shaders - affects GPU usage.
- Rigidbody - ensures that the object is controlled by the physics engine in Unity - e.g. pulled downward by gravity.
- NPC Vehicle (script) - provides the ability to change the position and orientation of the vehicle, as well as to control the turn signals and brake light.
Script can be found under the following path:
Assets/AWSIM/Scripts/NPCs/Vehicles
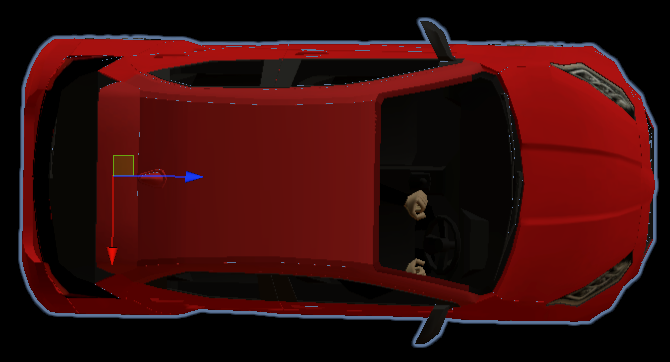
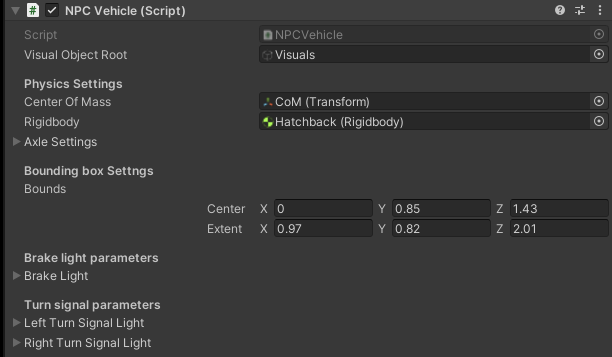
CoM
CoM (Center of Mass) is an additional link that is defined to set the center of mass in the Rigidbody.
The NPC Vehicle (script) is responsible for its assignment.
This measure should be defined in accordance with reality.
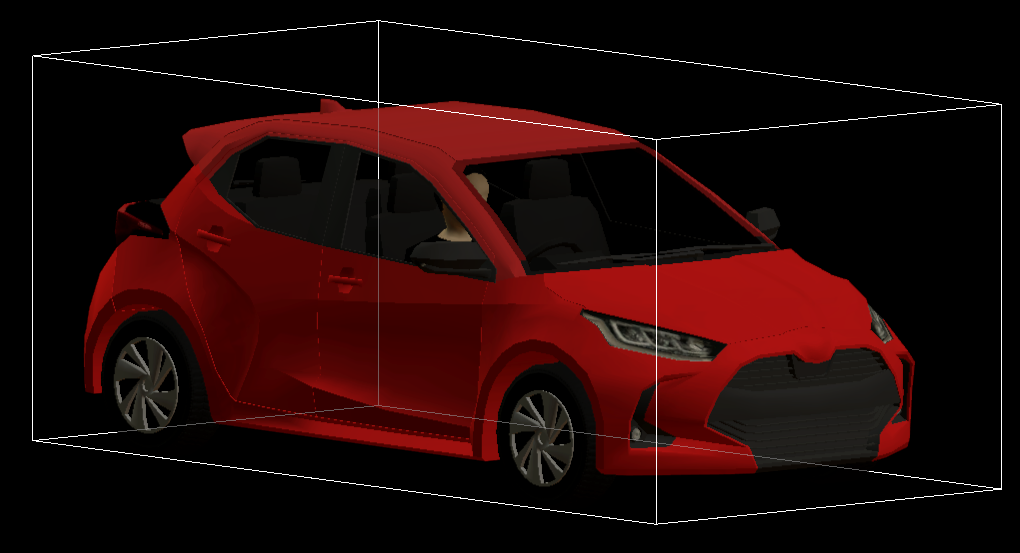
Most often, the center of mass of the vehicle is located in its center, at the height of its wheel axis - as shown below.
Colliders
Colliders are used to ensure collision between objects.
In NPCVehicle, the main BodyCollider collider and Wheels Colliders colliders for each wheel were added.
Body Collider
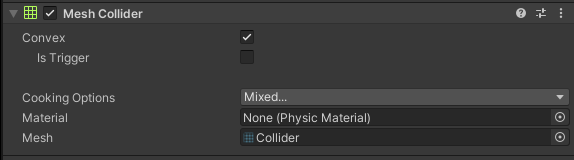
BodyCollider is a vehicle Object responsible for ensuring collision with other objects.
Additionally it can be used to detect these collisions.
The MeshCollider uses a Mesh of an Object to build its Collider.
The Mesh for the BodyCollider was also loaded from the *.fbx file similarly to the visual elements.
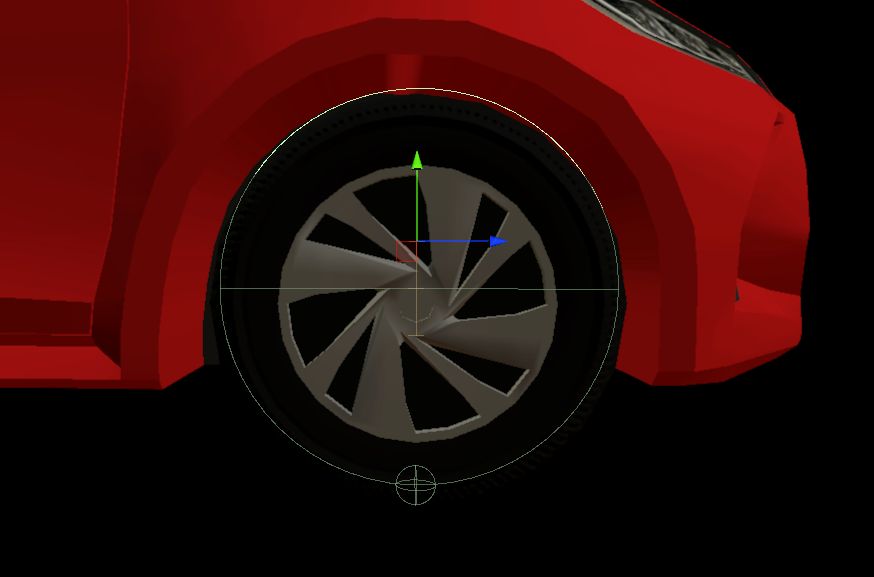
Wheels Colliders
WheelsColliders are an essential element from the point of view of driving vehicles on the road.
They are the only ones that have contact with the roads and it is important that they are properly configured.
Each vehicle, apart from the visual elements related to the wheels, should also have 4 colliders - one for each wheel.
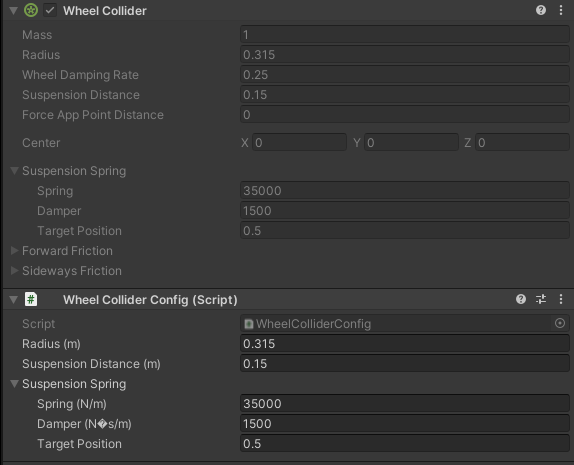
To prevent inspector entry for WheelCollider the WheelColliderConfig has been developed.
It ensures that friction is set to 0 and only wheel suspension and collisions are enabled.
Wheel Collider Config
For a better understanding of the meaning of WheelCollider we encourage you to read this manual.
LOD
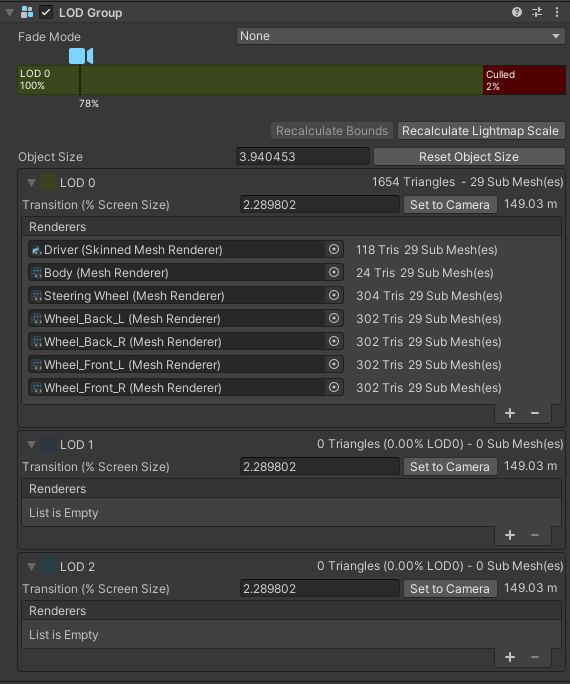
LOD provides dependence of the level of detail of the object depending on the ratio of the GameObject’s screen space height to the total screen height.
Vehicle models have only one LOD0 group, therefore there is no reduction in model complexity when it does not occupy a large part of the screen.
It is only culled when it occupies less than 2% of the height.
Rigidbody
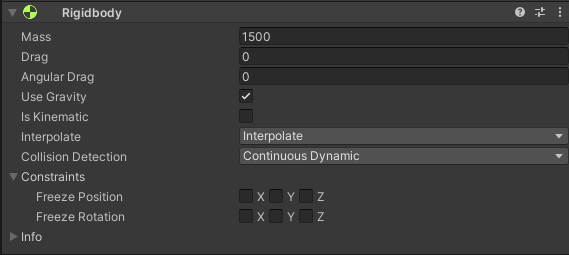
Rigidbody ensures that the object is controlled by the physics engine.
The Mass of the vehicle should approximate its actual weight.
In order for the vehicle to physically interact with other objects - react to collisions, Is Kinematic must be turned off.
The Use Gravity should be turned on - to ensure the correct behavior of the body during movement.
In addition, Interpolate should be turned on to ensure the physics engine's effects are smoothed out.
NPC Vehicle (script)
The script takes the Rigidbody and provides an inputs that allows the NPCVehicle to move.
Script inputs give the ability to set the position and orientation of the vehicle, taking into account the effects of suspension and gravity.
In addition, the script uses the CoM link reference to assign the center of mass of the vehicle to the Rigidbody.
Script inputs are used by RandomTrafficSimulator, which controls the vehicles on the scene - it is described here.
Input Data
| Category | Type | Description |
|---|---|---|
| SetPosition | Vector3 | Move the NPCVehicle so that its x, z coordinates are same as the specified coordinates. Pitch and roll are determined by physical operations that take effects of suspension and gravity into account. |
| SetRotation | Vector3 | Rotate the NPCVehicle so that its yaw becomes equal to the specified one. Vertical movement is determined by physical operations that take effects of suspension and gravity into account. |
Visual Object Root is a reference to the parent aggregating visuals, it can be used to disable the appearance of visual elements of the NPCVehicle in the scene.
Whereas Bounds Represents an axis aligned bounding box of the NPCVehicle.
It is used primarily to detect collisions between vehicles in the event of spawning, yielding and others.
Moreover, vehicle bounds are displayed by Gizmos.
The settings of the remaining elements, i.e. the Axle and the Lights, are described here and here.
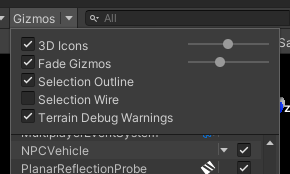
No Gizmo visualization
If you don't see Gizmo's visual elements, remember to turn them on.
Axle Settings

This part of the settings is responsible for the proper connection of visual elements with the collider for each wheel - described earlier.
The objects configured in this section are used to control the vehicle - its wheel speed and steering angle, which are calculated based on the input values.
Correct configuration is very important from the point of view of the NPCVehicle movement on the road.
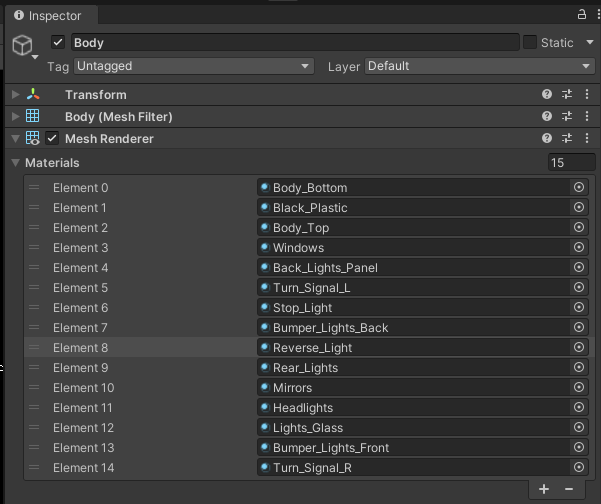
Lights Settings
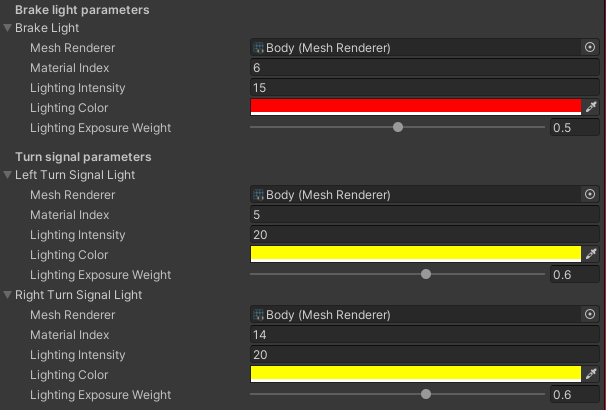
This part of the settings is related to the configuration of materials emission - used when a specific lighting is activated.
There are 3 types of lights: Brake, Left Turn Signal and Right Turn Signal.
Each of the lights has its visual equivalent in the form of a Mesh.
In the case of NPCVehicle all of the lights are included in the Body object Mesh, which has many materials - including those related to lights.
For each type of light, the appropriate Material Index (equivalent of element index in mesh) and Lighting Color are assigned - yellow for Turn Signals, red for Break.
Lighting Intensity values are also configured - the greater the value, the more light will be emitted.
This value is related to Lighting Exposure Weight parameter that is an exposure weight - the lower the value, the more light is emitted.
The brake light is switched on depending on the speed of the NPCVehicle, while RandomTrafficSimulator is responsible for switching the turn signals on and off.