4.8. PTP time synchronization#
4.8.1. PTP setting via web UI#
The Web UI has a tab called PTP Settings. Opening it reveals five buttons. The description below describes each button’s functionality.
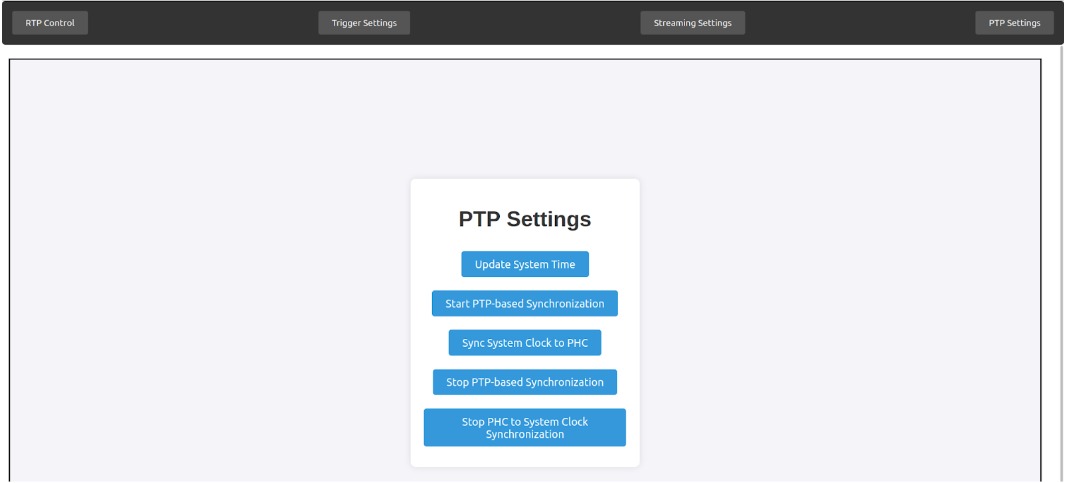
Fig. 4.11 Web GUI for PTP settings#
4.8.1.1. Update System Time#
Note
The GMSL10GbEthernet board must be connected to the Internet.
Retrieves the local time via an HTTP request and updates the system time.
Equivalent command is shown as below.
sudo date -s "$(wget -qs0- --max-redirect=0 google.com 2>&1 | grep Date: | cut -d' ' -f5-8)Z" && sudo phc_ctl /dev/ptp0 set
4.8.1.2. Start PTP-based Synchronization#
Starts the ptp4l slave (client) program on eth0.
Equivalent command is shown as below.
sudo ptp4l -i eth0 -s
4.8.1.3. Sync System Clock to PHC#
Starts a program that updates the system clock based on the PHC time.
Equivalent command is shown as below.
sudo phc2sys -a -r
4.8.1.4. Stop PTP-based Synchronization#
Stops the ptp4l slave program.
Equivalent command is shown as below.
sudo pkill -x "ptp4l"
4.8.1.5. Stop PHC to System#
Stops the PHC-based system
Equivalent command is shown as below.
sudo pkill -x "phc2sys"
4.8.2. Testing PTP#
In order to use PTP, the host PC must be running ptp4l on master mode (-m flag), while the device must be in slave mode. The device can start the appropriate PTP programs through the web GUI, as shown in the table above. The following steps to start PTP and test it have been shown to work.
Note
To perform the following steps, you need to install ptp4l and phc2sys on Host PC.
4.8.2.1. Start the PTP master on the host#
You can start the PTP master by issuing the following command on the host:
sudo ptp4l -i enp2s0f1 -m -S -A # replace enp2s0f1 with the proper interface
4.8.2.2. Start the PTP slave on the device#
Click on “Start PTP-based Synchronization” on the PTP tab of the web GUI. It is the second button in the image above.
4.8.2.3. Verify that PTP-based streaming works#
In the “RTP Control” tab of the web GUI, enable Custom Timestamp and Start of Frame Then, start streaming according to the section on streaming.
Afterwards, in the host PC, verify that the packets contain appropriate RTP information by issuing the following command:
sudo tcpdump -i enp2s0f1 -T rtp -x | grep "0x0020" | awk '{print "0x"$3$4}'
This should print out the current epoch seconds in HEX format. You can verify this by comparing side-by-side with the website epoch converter.
For instance, if you get 0x66bb12ac, the timestamp embedded in the data is 2024-8-13 Tuesday 08:00:44 (GMT)
Note
For more information of Custom Timestamp, please refer to the information at this link.
4.8.2.4. Verify that the system clock synchronizes via PTP#
Pressing the “Sync System Clock to PHC” button synchronizes the system clock. You can verify that the two clocks are in sync by comparing the output given by the following command on the two machines:
watch -n 0.1 date +%s.%N
You can simulate a wrong clock by issuing the following command on the board:
Note
You need to disable the automatic time synchronization function on the PTP master side.
sudo date +%T -s "15:00:00"
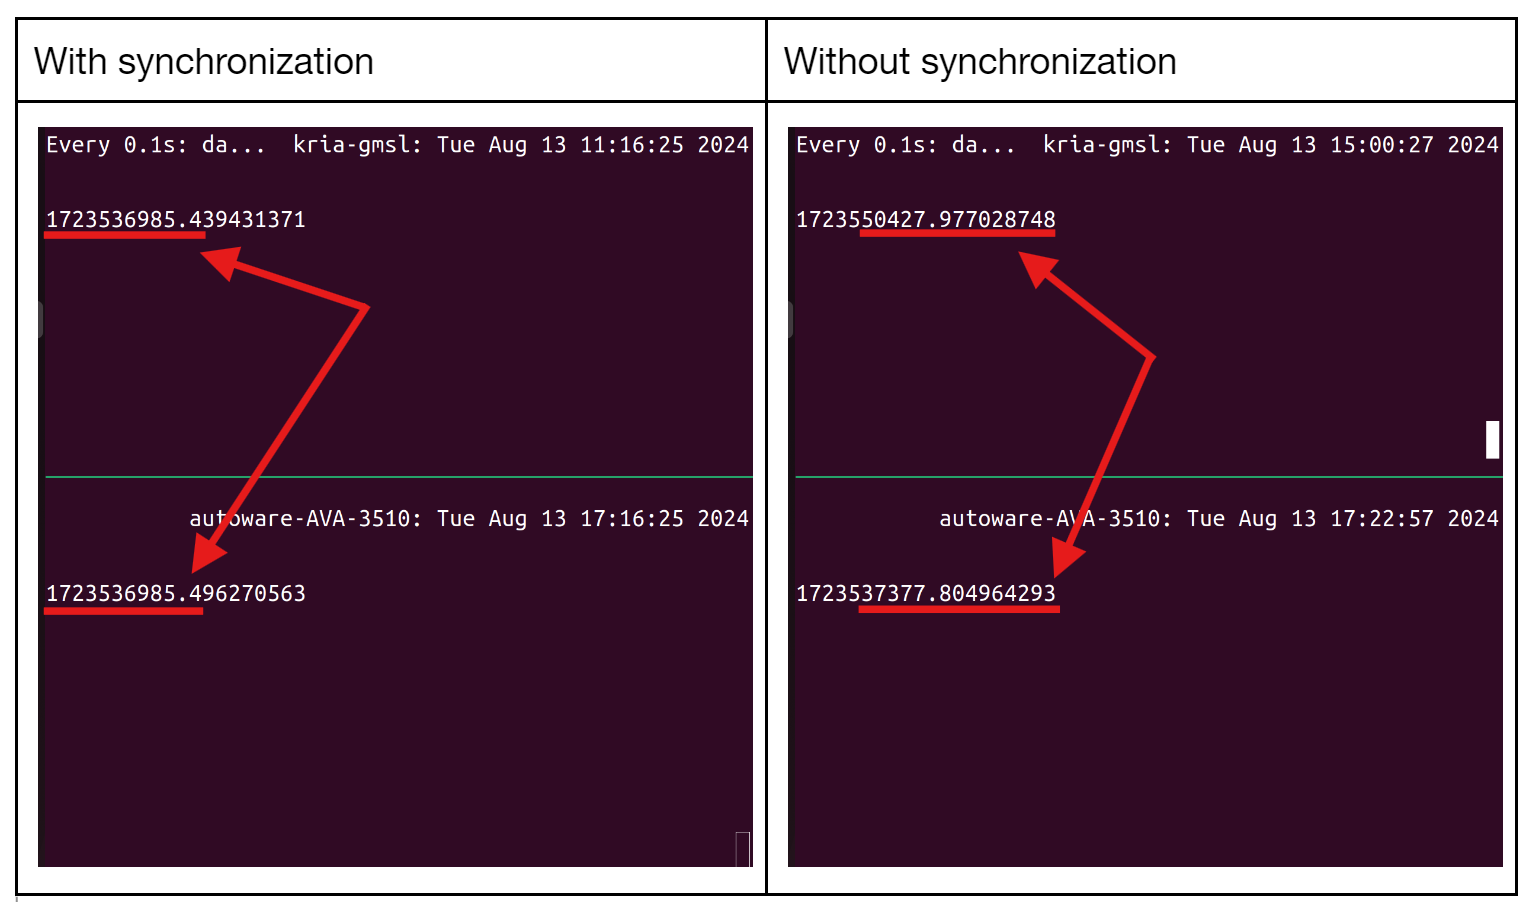
You can confirm that “With synchronization” result, the system clock is matching between the host and the board. On the other hand, in the case of “Without synchronization”, the system clock differs between the host and the board.