1.2. Installation Guide for NVIDIA Jetson AGX Orin Developer Kit#
Note
This document is for users of the NVIDIA Jetson AGX Orin Developer Kit.
Note
This document is based on tier4_automotive_hdr_camera version 2.2.0.
1.2.1. Required Items#
1.2.1.1. Hardware Requirements#
Deserializer kit
LI-JXAV-MIPI-ADPT-4CAM x 1
LI-GMSL2-IPX-DESER x 1~4 (1 per 2 cameras)
FAW-1233-03 x 1~4 (1 per 2 cameras)
FAKRA coaxial cables (FAKRA to FAKRA) x 1~8 (1 per camera)
TIER IV Automotive HDR Camera (C1, C2, C3, C1-MP, or C2-MP)
1.2.1.2. Software Requirements#
Software |
Version |
Download Link |
|---|---|---|
Linux for Tegra (JetPack) |
r36.4.4 (6.2.2) |
|
tier4-gmsl-camera |
2.2.0 |
1.2.2. Flashing the OS (BSP)#
Attention
Please note that the BSP flashing process is outside our standard support scope. For any inquiries, troubleshooting, or issues related to OS installation, please contact your hardware distributor or NVIDIA support directly.
If your target Developer Kit does not meet the software requirements, please flash the device with the supported BSP (Linux for Tegra). You can choose from the following two methods:
Manual Flash: Download the L4T release package from the link above and flash the Developer Kit manually via the command line. For detailed instructions, please refer to the Quick Start Guide.
NVIDIA SDK Manager: Use the NVIDIA SDK Manager to install JetPack 6.2.2.
1.2.3. Hardware Connection#
Ensure that the Jetson AGX Orin Developer Kit (hereinafter referred to as Developer Kit) is powered off.
Connect the Deserializer Kit and cameras as shown below.

Fig. 1.1 Connection Examples for Each Component (1 Camera)#
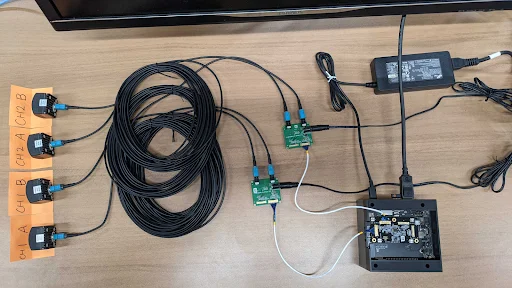
Fig. 1.2 Connection Examples for Each Component (4 Cameras)#
Details on connecting each deserializer board and camera
Connect the LI-JXAV-MIPI-ADPT-4CAM to the connector on the rear side of the Developer Kit.
Note
The LI-JXAV-MIPI-ADPT-4CAM is designed for the Jetson AGX Xavier Developer Kit, so there may be slight interference with the enclosure when connecting it to the Jetson AGX Orin Developer Kit. Please use it with caution, or consider using the adapter mentioned in the link to prevent any issues.
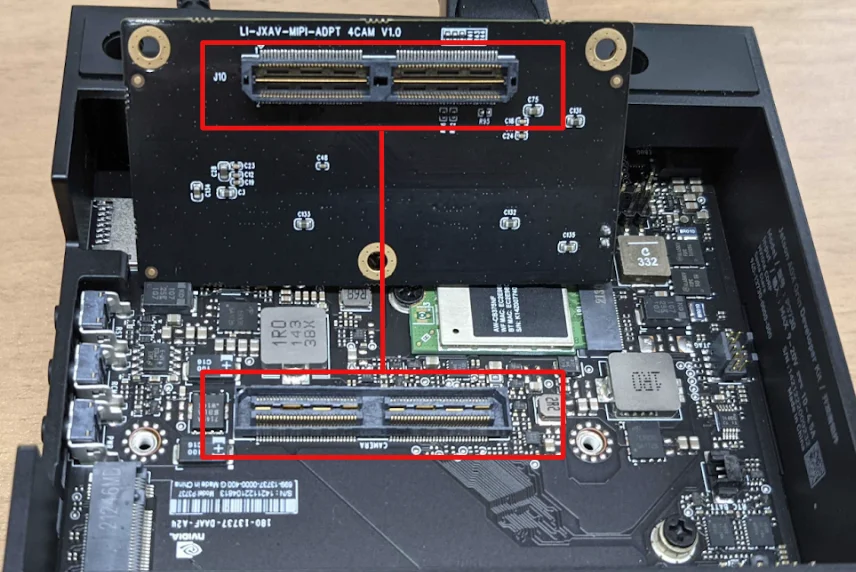
Fig. 1.3 LI-JXAV-MIPI-ADPT-4CAM connector#
Next, insert the FAW-1233-03 cable into CH1 of the LI-MAX9296-IPX-DESER.
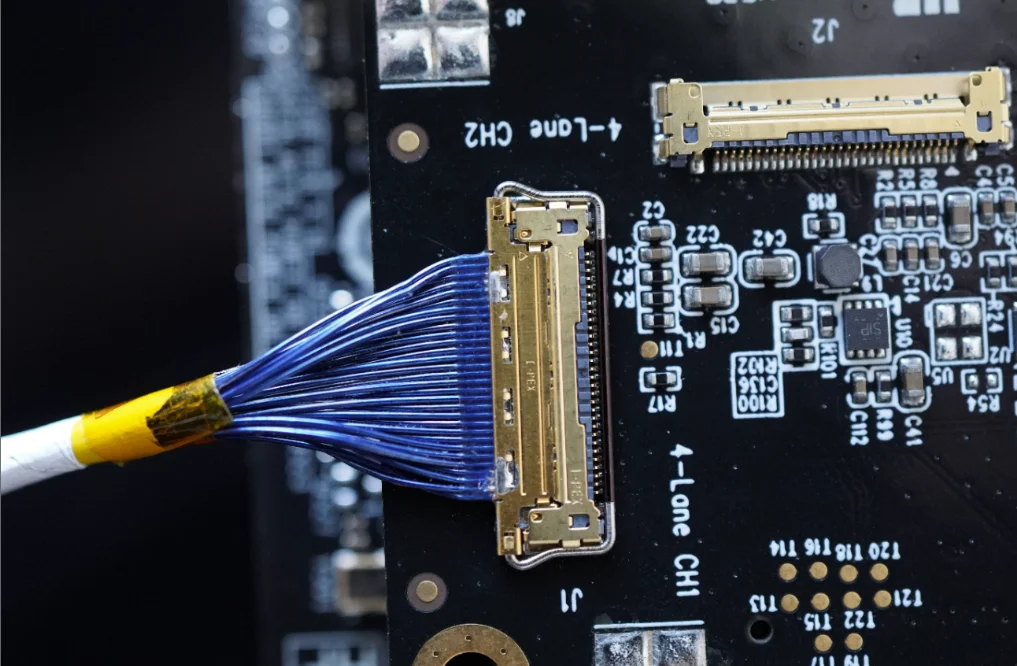
Fig. 1.4 Example of FAW-1233-03 Cable Connection#
Insert the other end of the previously connected cable into Port A of the LI-MAX9296-IPX-DESER. For single-camera evaluation, insert the FAKRA connector of the GMSL2 cable into Port A of the LI-MAX9296-IPX-DESER. For connecting two cameras, connect the FAKRA connector to Port A and Port B.
Attention
Please note that you need to supply 12V for the deserializer from an external AC adapter separately.
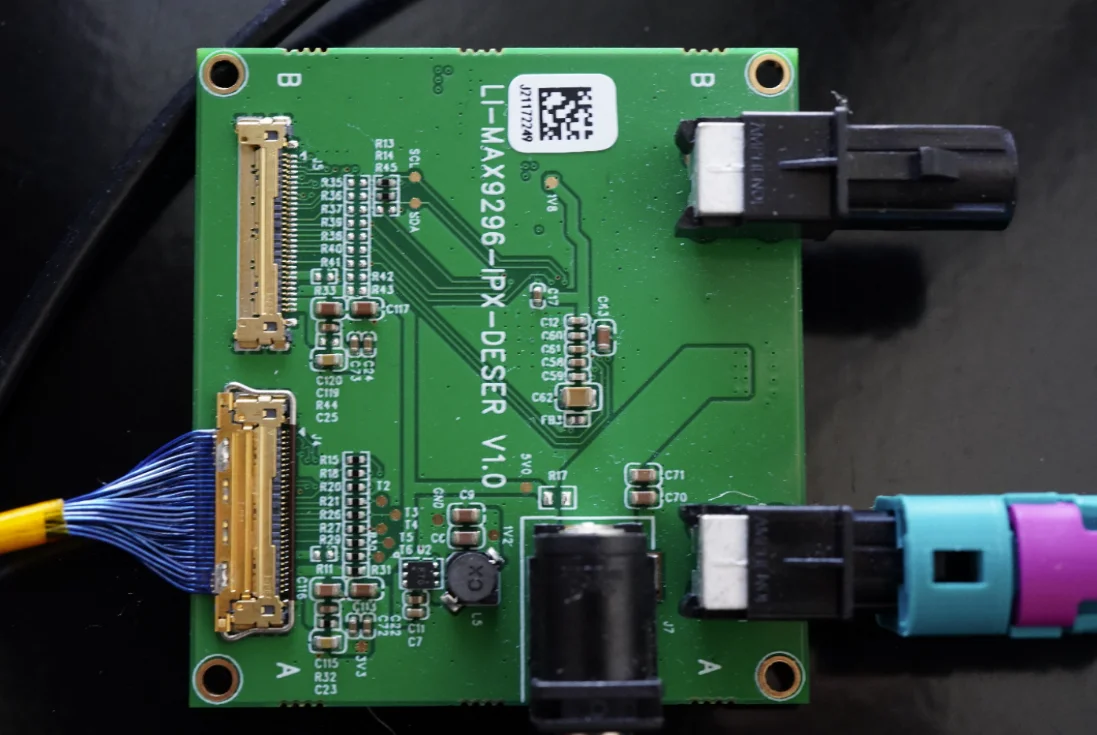
Fig. 1.5 Example of LI-MAX9296-IPX-DESER Cable Connection#
Connect the camera to the other FAKRA connector of the GMSL2 cable. Ensure that the side with the silver label is facing upwards.
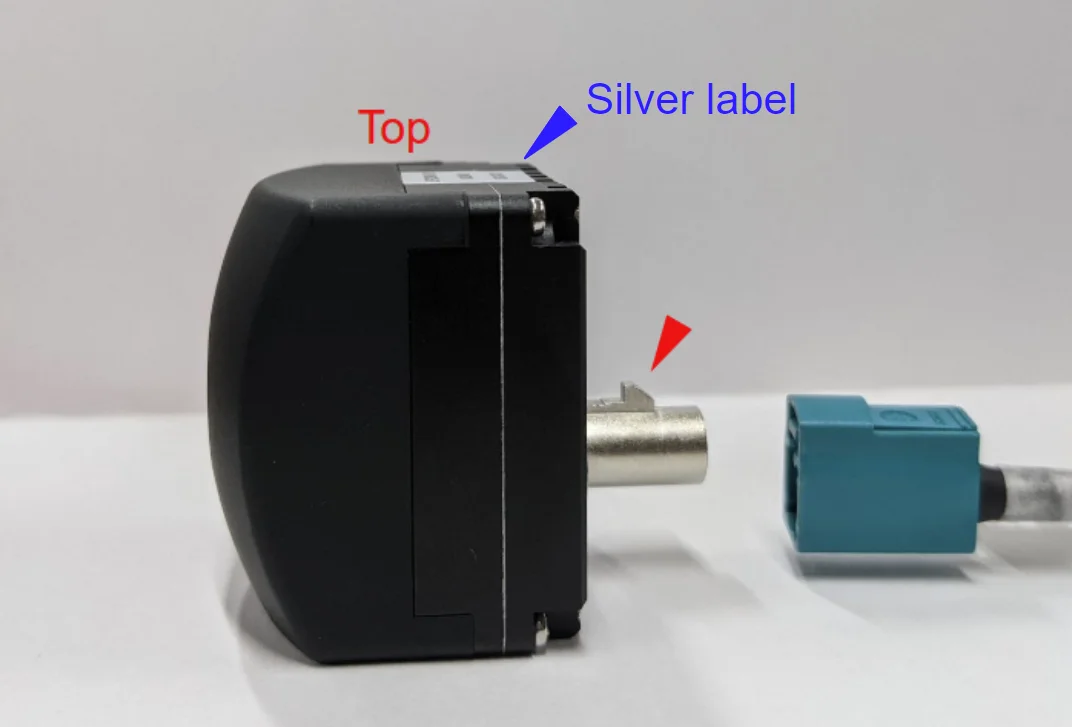
Fig. 1.6 Camera Orientation and Cable Insertion Direction (Silver Label Side Up)#
Restriction regarding C2 and C3 camera
Currently, two C2 / C3 cameras cannot be connected to single deserializer board.
For example:
Port 1 and 2 … NG
Port 3 and 4 … NG
Port 1 and 3 … OK
Port 1 and 5 … OK
1.2.4. Power ON and Login#
Power On
Power on the Jetson AGX Orin Developer Kit and confirm that the power-on LED illuminates.
Login
Please log in using the username and password configured during the BSP flashing process.
1.2.5. Camera Driver Installation#
This process should be performed on the Developer Kit.
Step 1: Download the Driver
Open a terminal on the Developer Kit and run the following command to download the driver package.
wget https://github.com/tier4/tier4_automotive_hdr_camera/releases/download/v2.2.0/tier4-camera-gmsl_2.2.0_arm64.deb
Step 2: Install the Driver
Execute the following command in the directory where the downloaded .deb file is located to install the package.
sudo apt install ./tier4-camera-gmsl_*.deb
Step 3: Configure the Device Tree
Note
For advanced configurations, including how to connect a combination of different camera types, please refer to the camera driver’s GitHub page.
After installing the driver, you need to generate a custom .dtb file to define the assignment of cameras for each GMSL port. Run the command corresponding to your camera type:
C1
sudo /opt/nvidia/jetson-io/config-by-hardware.py -n 2="TIERIV GMSL2 Camera Device Tree Overlay: C1x8"
C2
sudo /opt/nvidia/jetson-io/config-by-hardware.py -n 2="TIERIV GMSL2 Camera Device Tree Overlay: C2x8"
C3
sudo /opt/nvidia/jetson-io/config-by-hardware.py -n 2="TIERIV GMSL2 Camera Device Tree Overlay: C3x8"
C1-MP
sudo /opt/nvidia/jetson-io/config-by-hardware.py -n 2="TIERIV GMSL2 Camera Device Tree Overlay: C1MPx8"
C2-MP
sudo /opt/nvidia/jetson-io/config-by-hardware.py -n 2="TIERIV GMSL2 Camera Device Tree Overlay: C2MPx8"
Step 4: Restart the System
To apply the device tree changes, power off the system and turn it back on.
sudo shutdown -h now
(After the Developer Kit has completely shut down, press the power button to restart it.)
1.2.6. Verify Camera Recognition#
Open a terminal and run the following command to verify that the cameras are recognized as V4L2 devices. If the number of video devices matches the number of connected cameras, the camera recognition check is complete.
ls /dev/video*
/dev/video0
/dev/video1
.
.
1.2.7. Reference#
1.2.8. Next Steps#
For image acquisition and detailed settings, please refer to the Camera Operation and Configuration Guide.